Utariga — a procedural island city that Claude and I both edit
This project is a gen AI workflow exploration for worlds. The low res procedural city is a starting point for making more detailed procedural content. The city layout and roads are editable in browser, somewhat, its persistent (when run locally) but not multiplayer. I mainly wanted to explore making the buildings and lighting them with gen AI as 3d assets. The main workflow is editing a building ("stub") in Blender either manually or with Claude and the dcc-mcp. Opus does an interesting job of layout and set dressing. I had it design a few buildings end to end. The other workflows I have explored here are lighting the scene in Blender and bringing back the lighting to Utariga, or editing the lighting with Flux running locally and have the lighting tuned to the image. I can also make depth and panorama images from Utariga and send that to World Labs Marble to make splats, and bring those back into Utariga. Another fun experiment was segmenting something out of the splat and making it 3D and bringing that back into Utariga.
Most everything is deep linkable so I can share all settings for a compare in a URL.
Disclaimer: This is a workflow/tool exploration, some assets/splats are low quality to save tokens, it hasnt had an optimization pass and can make my GPU's fan come on if 4k.
Utariga is a procedural island city that runs in a browser tab, and that Claude and I both edit, live. The whole island regenerates deterministically from one seed. There are about 300 buildings on it. Every one of them is a JSON spec — an archetype plus seeded parameters — and the geometry is derived from that spec, never stored. The database holds the seed and a list of per-building deltas. Nothing else.
My background is tech art and game tools so Im exploring tools and workflows while increasing the content quality incrementally. The round trip can be reviewed, versioned, and put back into a scene without a human retyping it. Most of my career has been the pipeline and tools for artists in game studios.
Im exploring the round trip the assets make. A building leaves the live engine as a GLB, gets modeled and lit in Blender, comes back onto the same lot. A camera authored in Blender comes back with it as a shot. A Cycles or Octane render of that camera publishes back into the app for blend/wipe compares. A Flux or Qwen re-imagining of the frame I'm looking at publishes back into the app. A panorama becomes a Gaussian splat and lands aligned in the scene. An object clicked inside that splat becomes a real GLB standing in the right spot. All of it arrives as a comparable target on the exact same camera, with a blend slider, a wipe, and a URL — art review tools.
In the live app
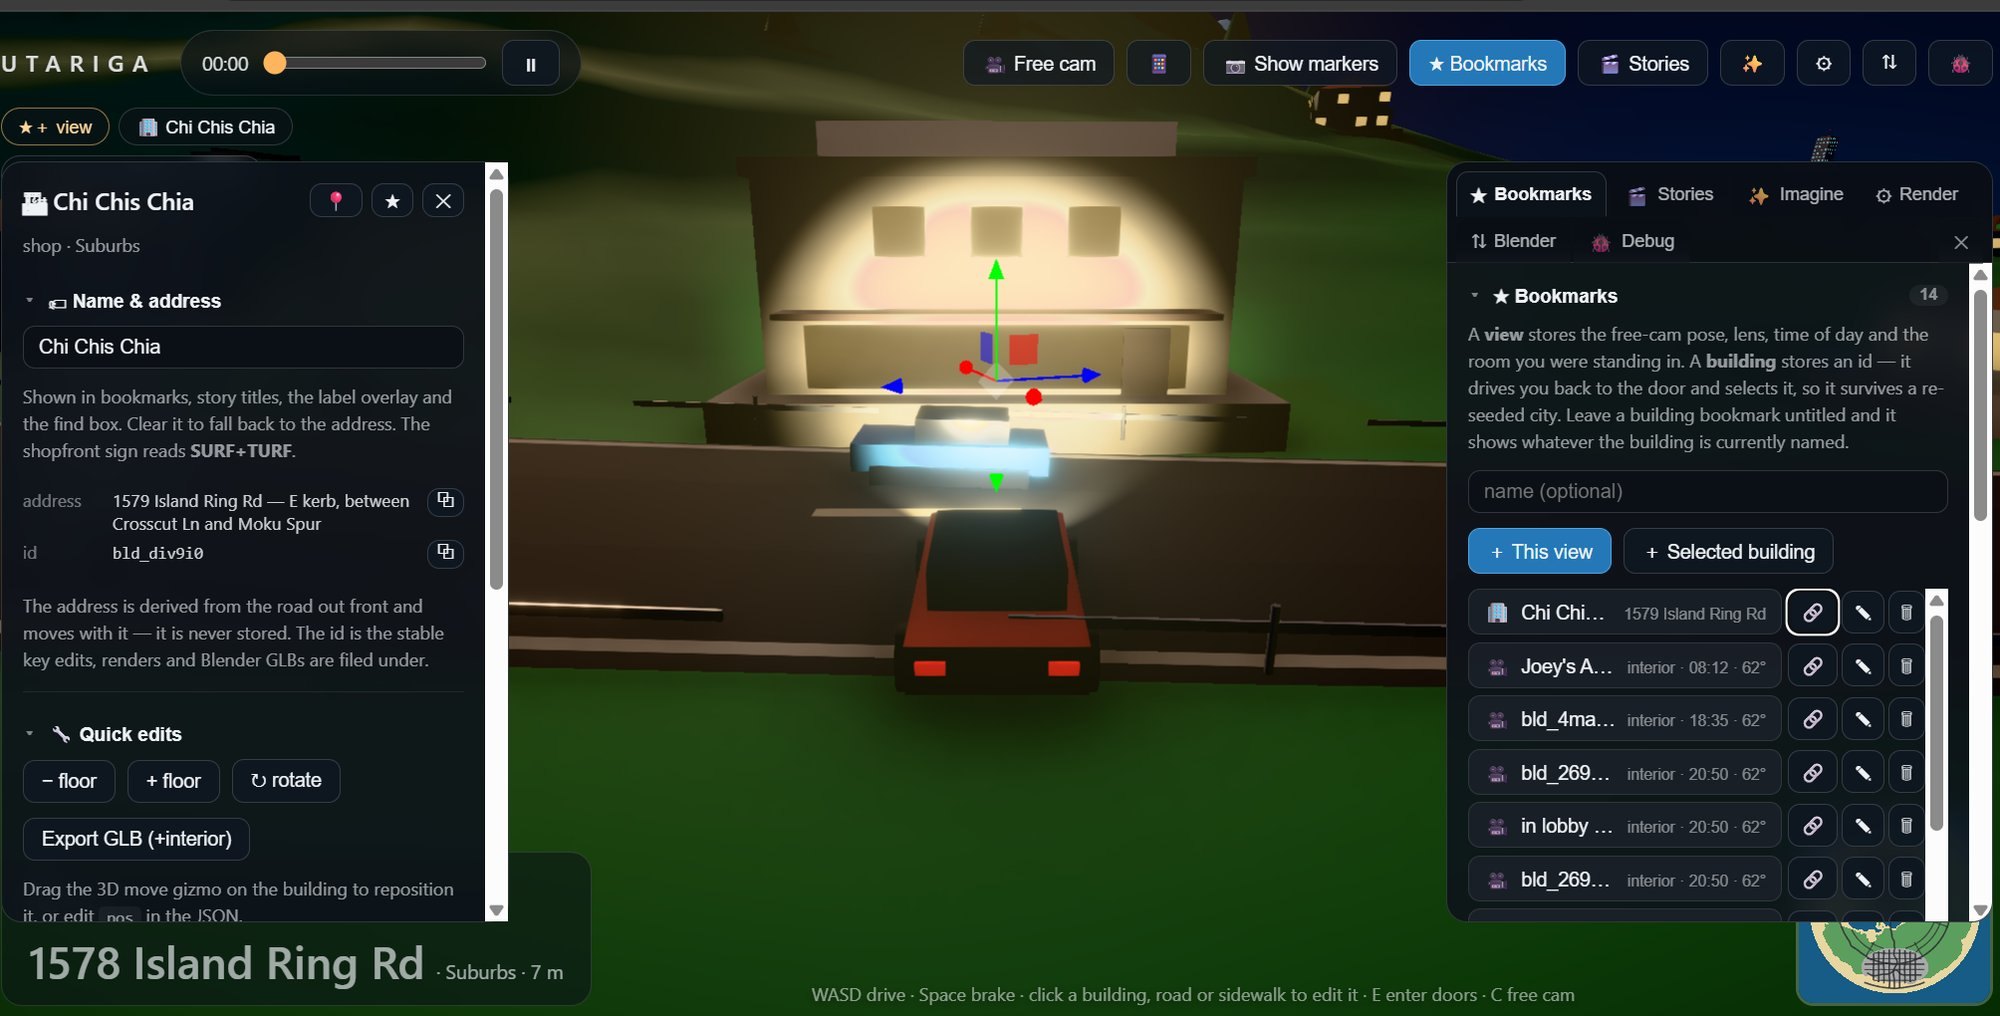
I told Claude to make the simple terrain and layout procedural, I directed that it have a downtown, beachy residential, and the mountain with road switchbacks and sci-fi towers. Buildings get placed in lots along those roads, facing the street. Then the terrain follows the roads and the building footprints — the same thing I'd have built a Houdini graph to do. Street addresses aren't stored either; they're derived from the road network on demand, so editing a road re-addresses everything on it.
1. Editing the city while it's running
Everything structural is editable in the browser, and the consequences propagate immediately. Select a road and drag it: the road re-splines, pedestrians follow, and the terrain follows it — the ground under the new path lifts or cuts to meet it, because the heightfield is derived from the network rather than painted. Everything addressed off that road gets re-addressed.
Grab a building with the gizmo and raise it, and the ground follows the footprint up with it rather than leaving it hovering. Change a building's storey count and it rebuilds from its spec — new floors, new window bands, new roof, and the interior volume and the walk-in navigation rebuild to match. Click a building, edit its JSON directly, hit apply, and the city rebakes around the change.
In the live app
2. Taking a building to Blender, live, from the browser
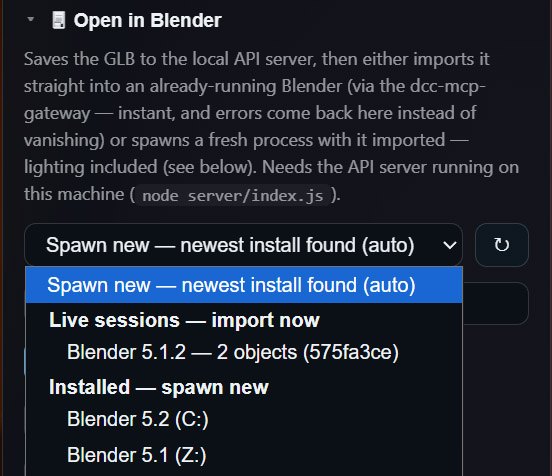
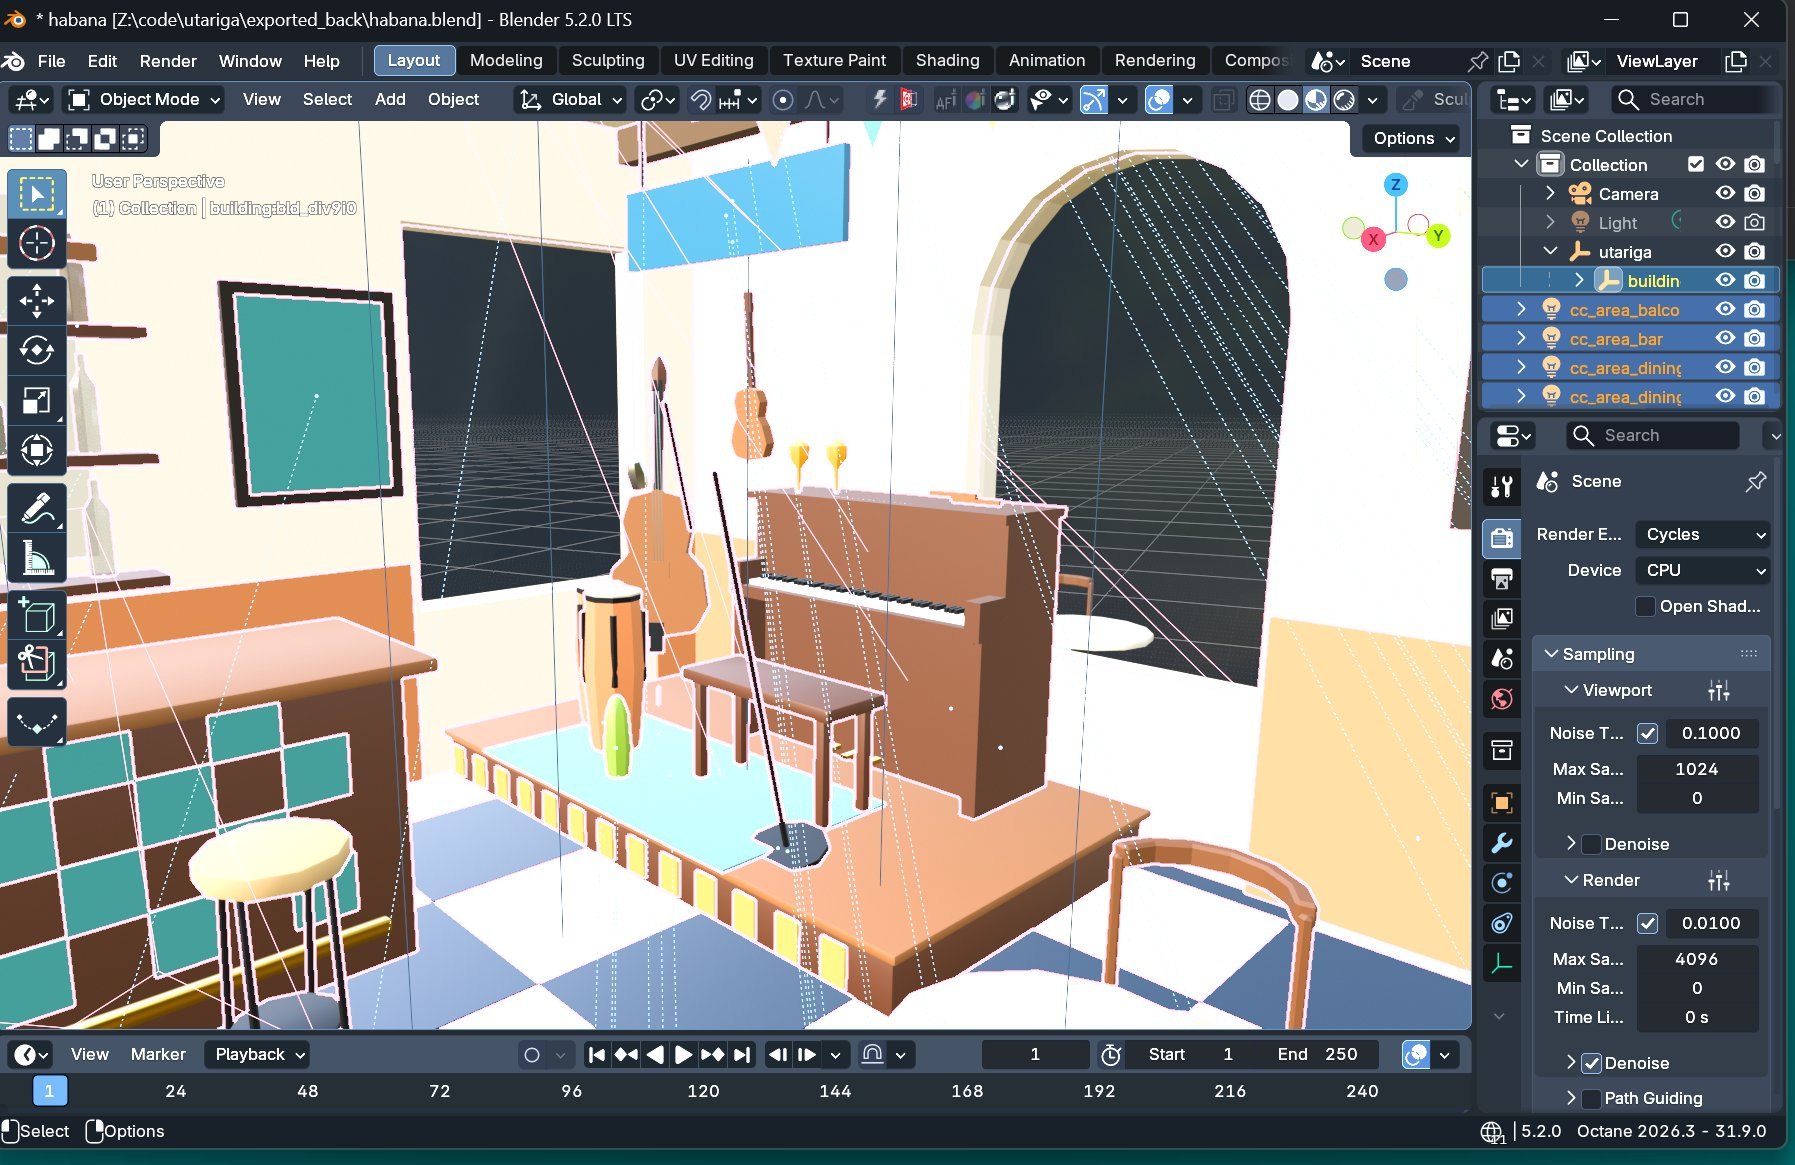
Any building exports as a GLB straight out of the browser app. From there it goes into Blender via mcp (if you run locally), where Claude does the authoring pass through a live MCP gateway — I tell Claude to try to write reusable tools for making these buildings. I give art direction in plain language and it models, set dresses and lights the interior.
Not all of it is Claude. I cleanup its mistakes and add stuff of my own, edit layouts, edit/add lighting and cameras, and send it back.
The edited GLB comes back and re-binds to the same lot. Cameras authored in
Blender come back too, as shot nodes, and this is the detail that
makes the whole loop hold together: a shot is stored in building-local
space, not world space. So when I drag the building to a different lot,
its cameras go with it, still framed on the thing they were framed on. Renders get
indexed against the shot by name, which means the camera's name in Blender is the
contract — renaming it orphans its renders.
Chi Chi's Chia → bld_div9i0 two-storey paladar · the newest build
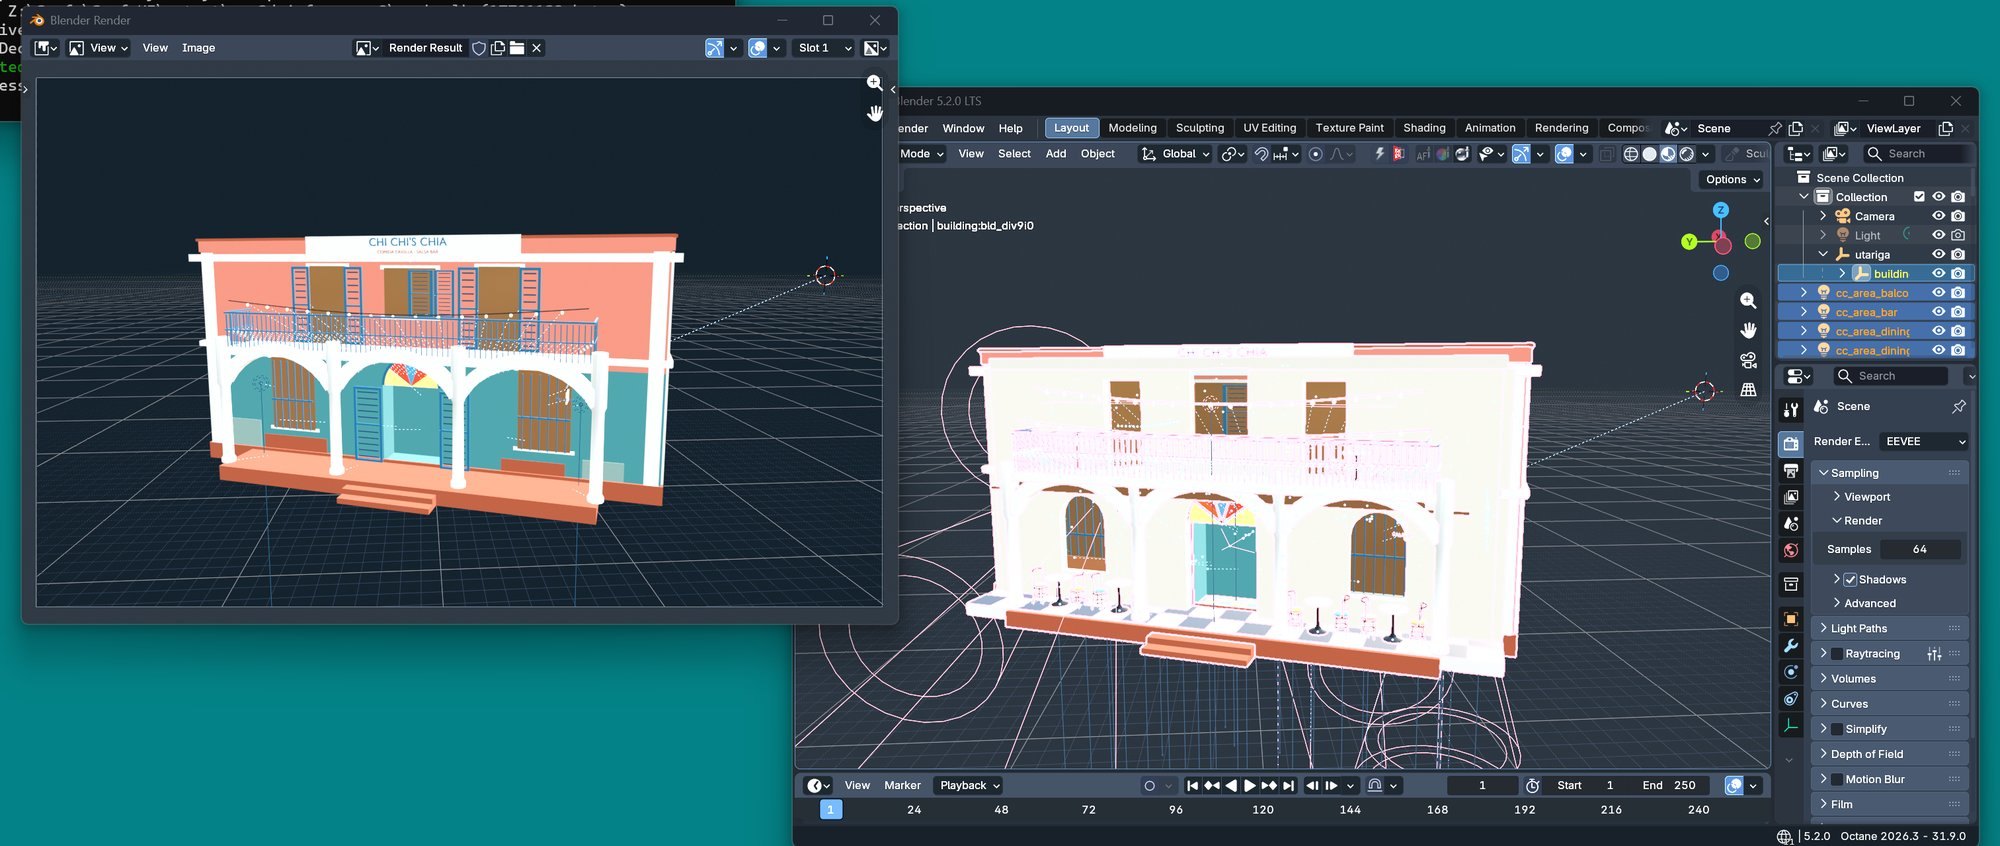
In the live app
The Cycles set — same building, same syntax, swapping the render id
Joey's Apartment → bld_910c2a 0239 Anuenue Spur · beach hut, back-island hamlets
The brief I gave Claude
remodel the cozy bedroom/studio apartment in the same low poly style, but add lights and do lots of "set dressing" by adding objects that make sense for "Joey's Apartment"… this is a small bachelor apartment in a coastal location. add some surfboards and skateboards and a pelican on a bicycle. there is a bean bag chair. use up to 10 point lights, 4 spots and 2 area lights… this building should have old school shutters, it's old and islandy.
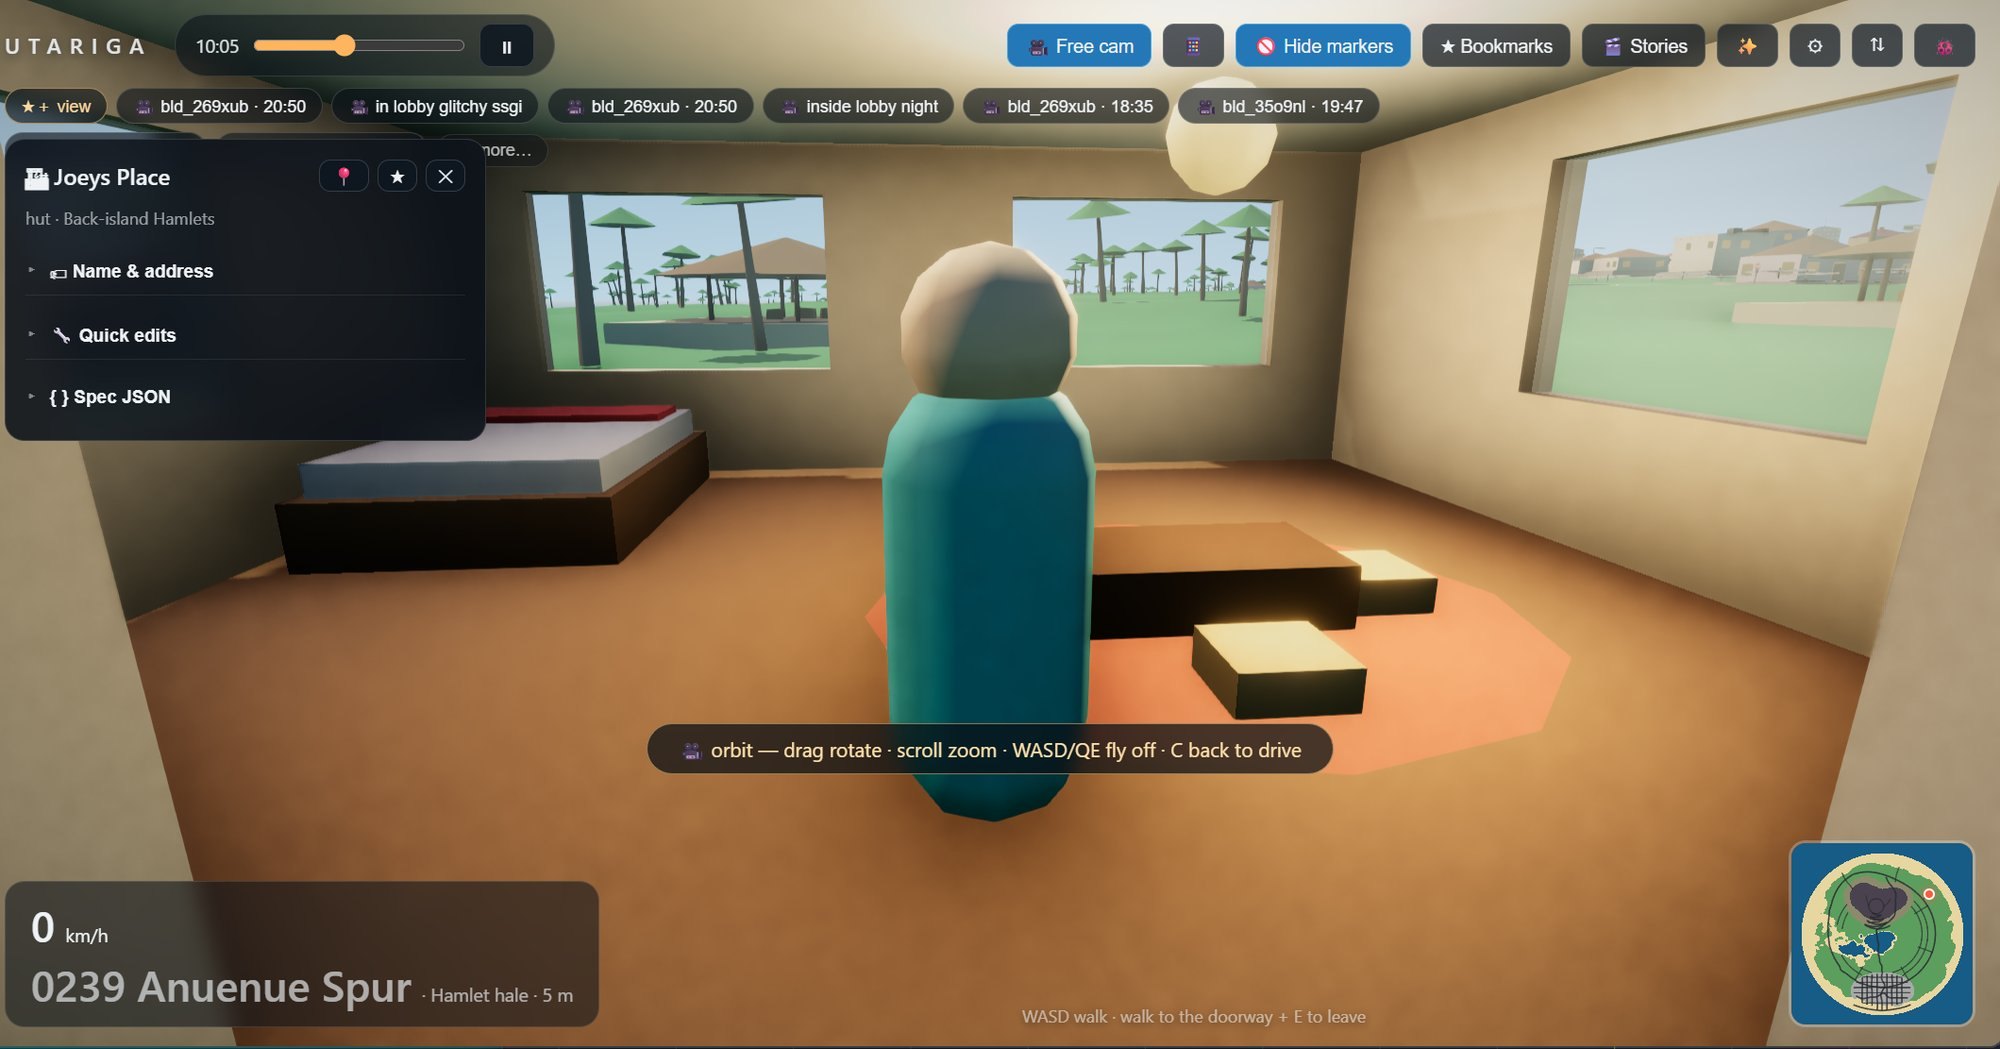
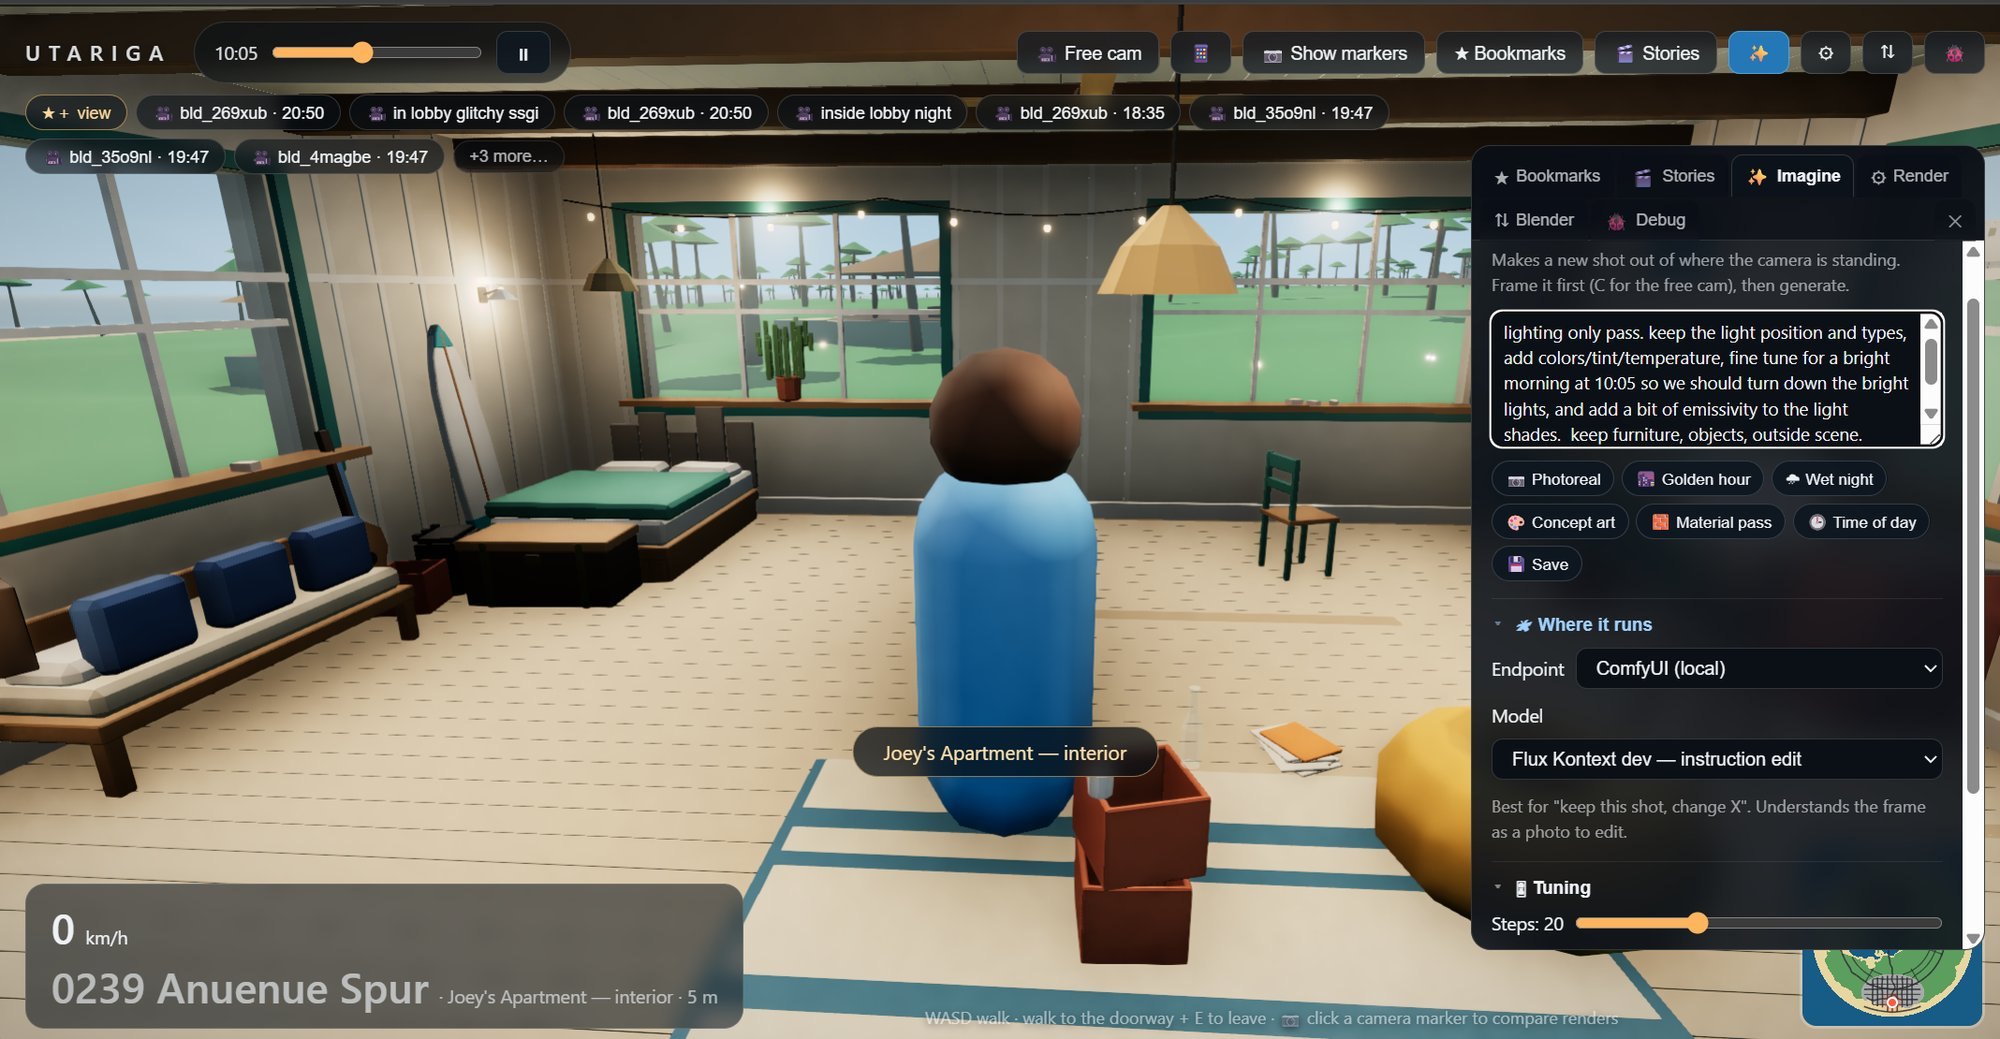
Blender-authored cameras, in the live app
The Spire → bld_35o9nl 0380 Serpentine Climb · 923 objects round-tripped
In the live app
Lux Alpine → bld_4magbe Cycles and Octane on the same cameras
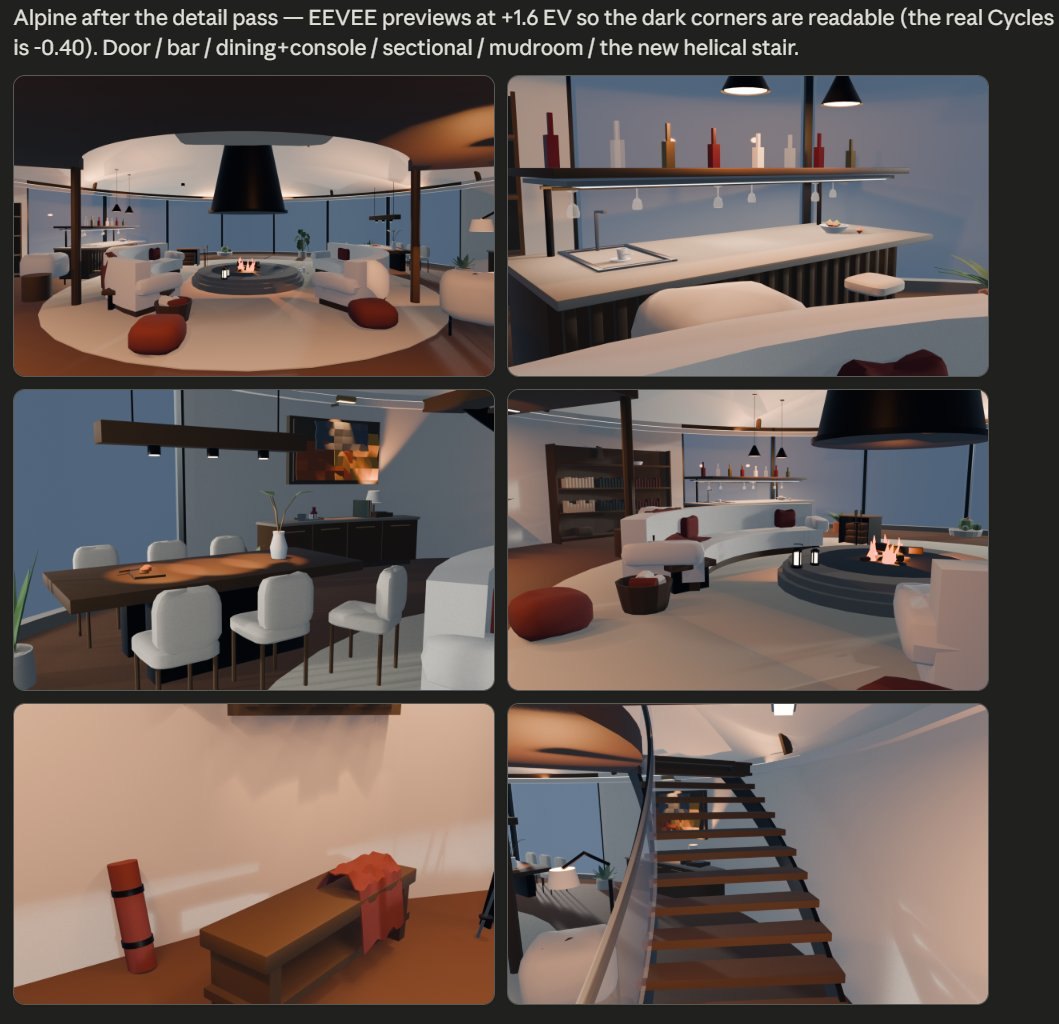
Open as wipe compares on the exact authored camera
3. Octane and Cycles renders, published back onto the authored camera
I wanted to know how far off the real-time lighting actually was. Also I'd paid for Octane through the end of the year and wanted an excuse.
Renders publish from Blender straight back into the app through a small addon, keyed by (building, camera name). They deliberately don't live in the city-state document: the browser owns that blob and PUTs it whole, so a render published between two client saves would get silently dropped. They live server-side and get joined to the shot by name.
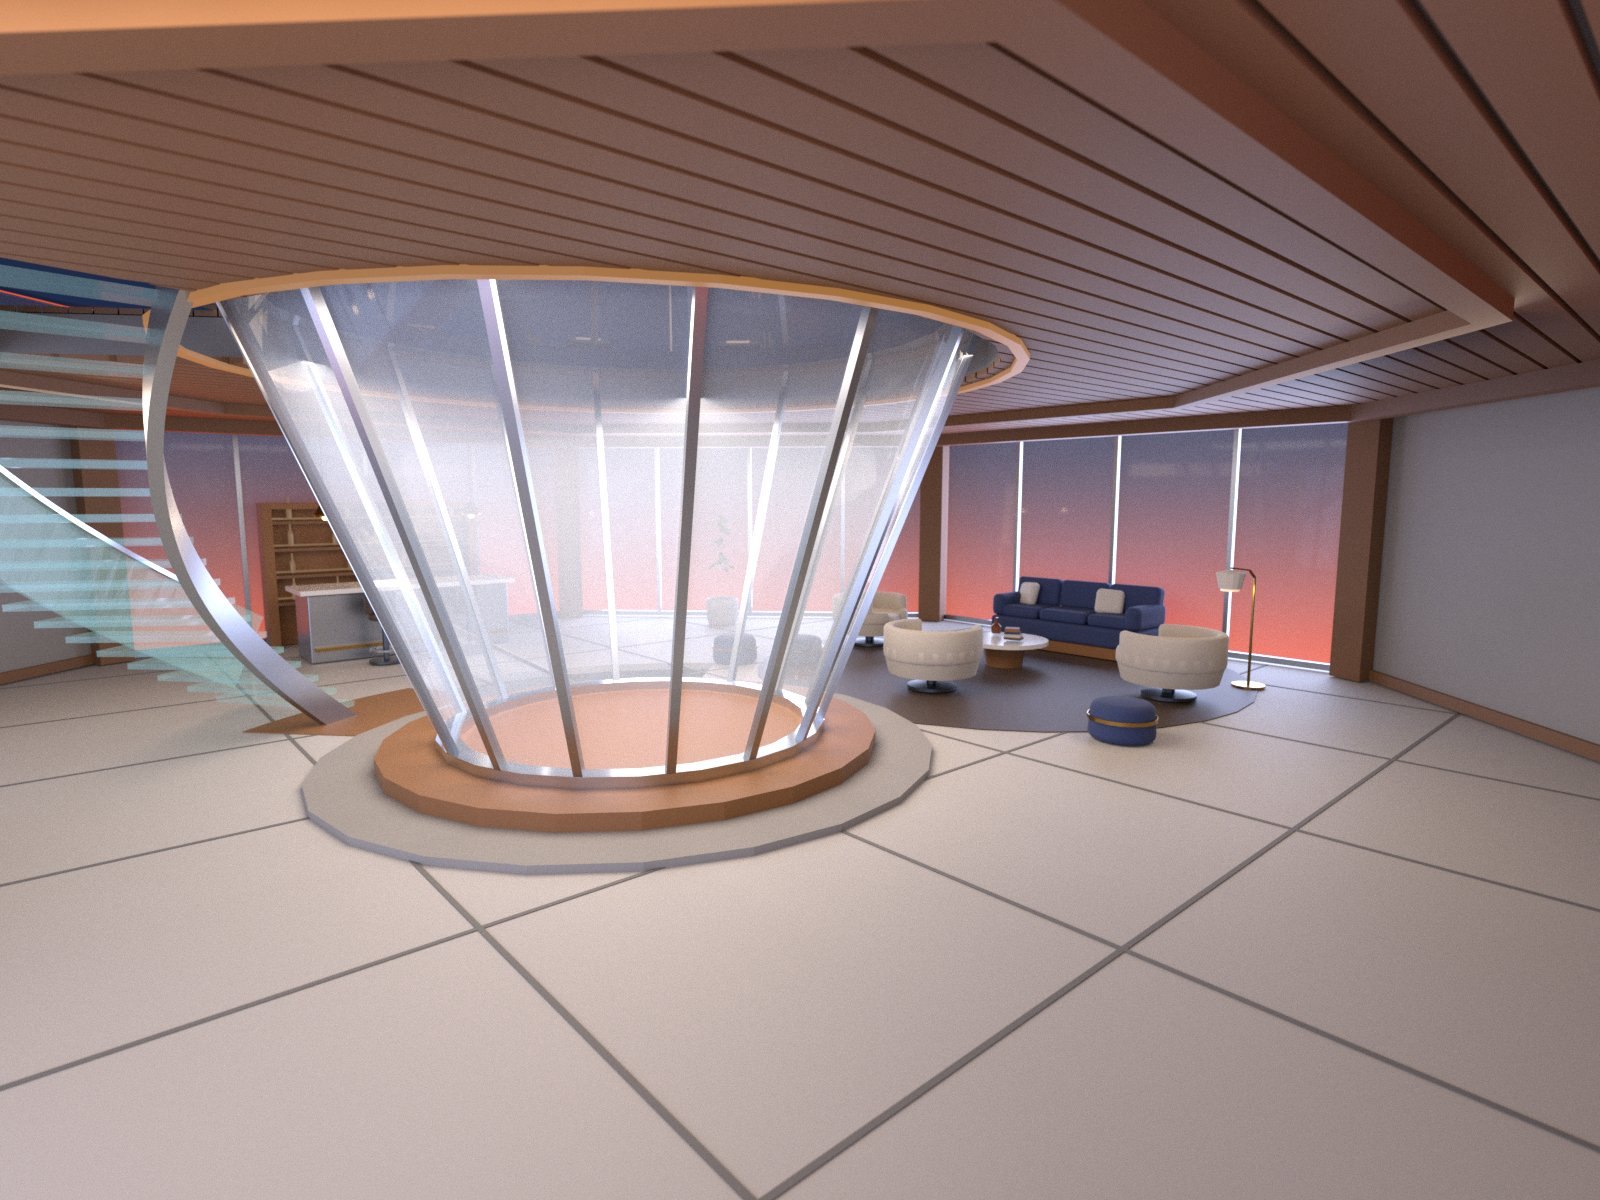
Opening one puts the camera exactly where the Blender camera stood, at the same vertical field of view, and overlays the render on the live frame with a blend slider and a wipe. It also hides the avatar, because a comparison is scene-versus-render and a character standing in frame is noise. And every comparison has a URL — a cold page load waits for the building's GLB to be resident, loads that building's render index, enters the interior if it needs to, and sets the time of day, because a night render opened at noon reads as "the render doesn't match" for no visible reason.
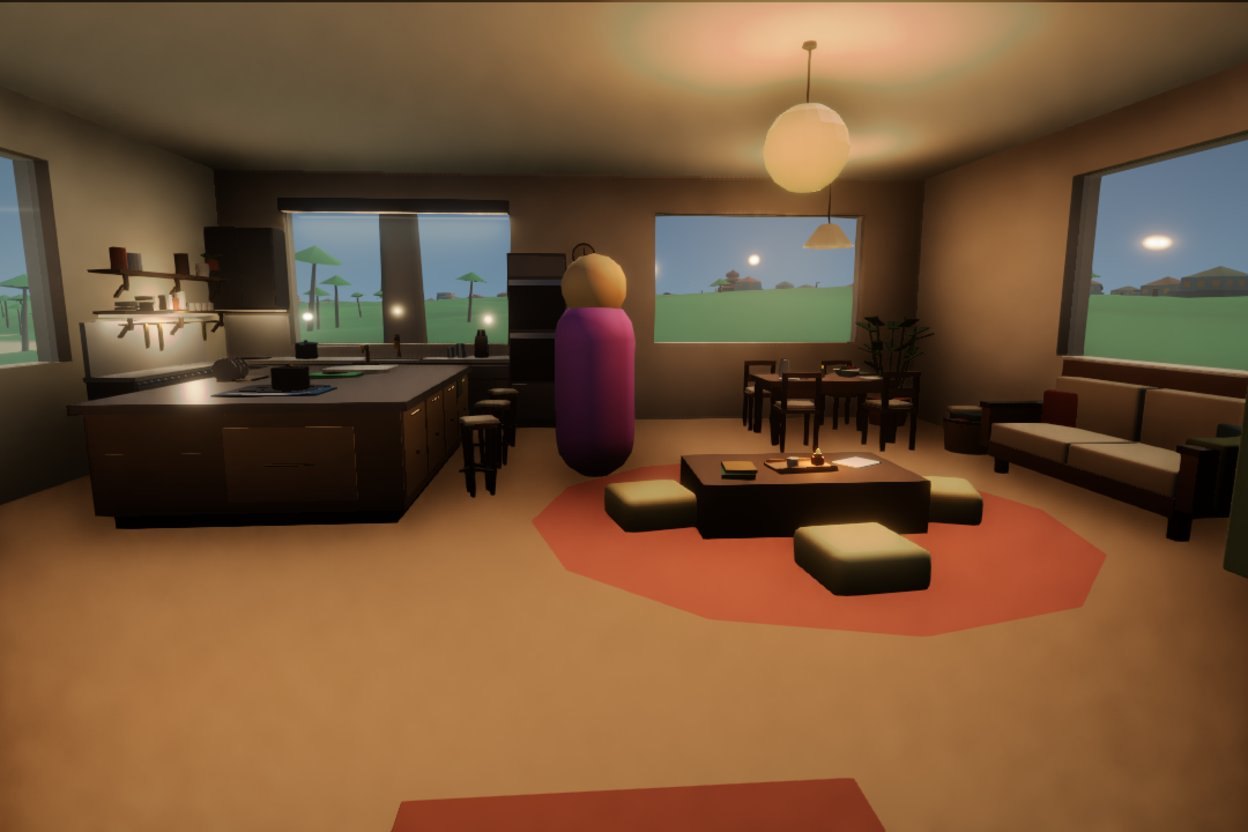
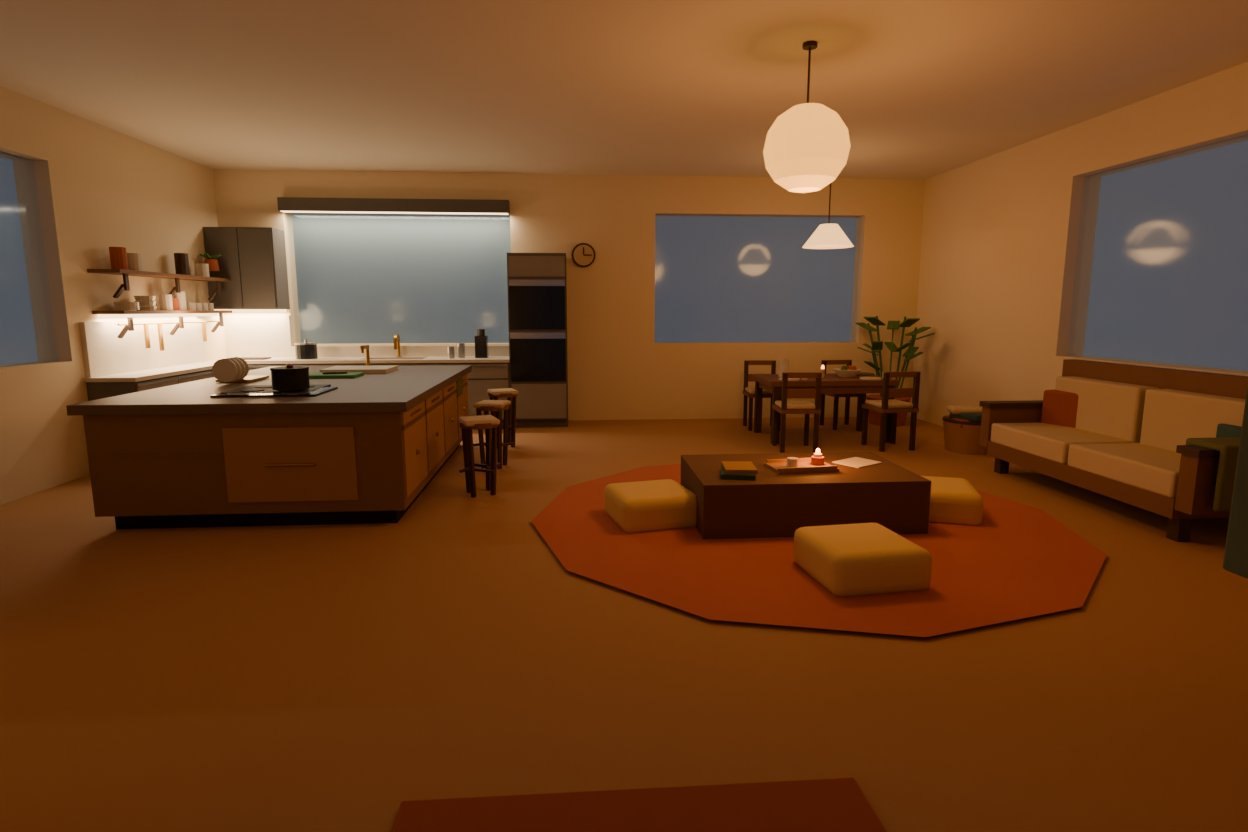
The Spire → bld_35o9nl Octane · glass atrium cone
In the live app
4. ✨ Imagine — the frame I'm looking at, plus a prompt
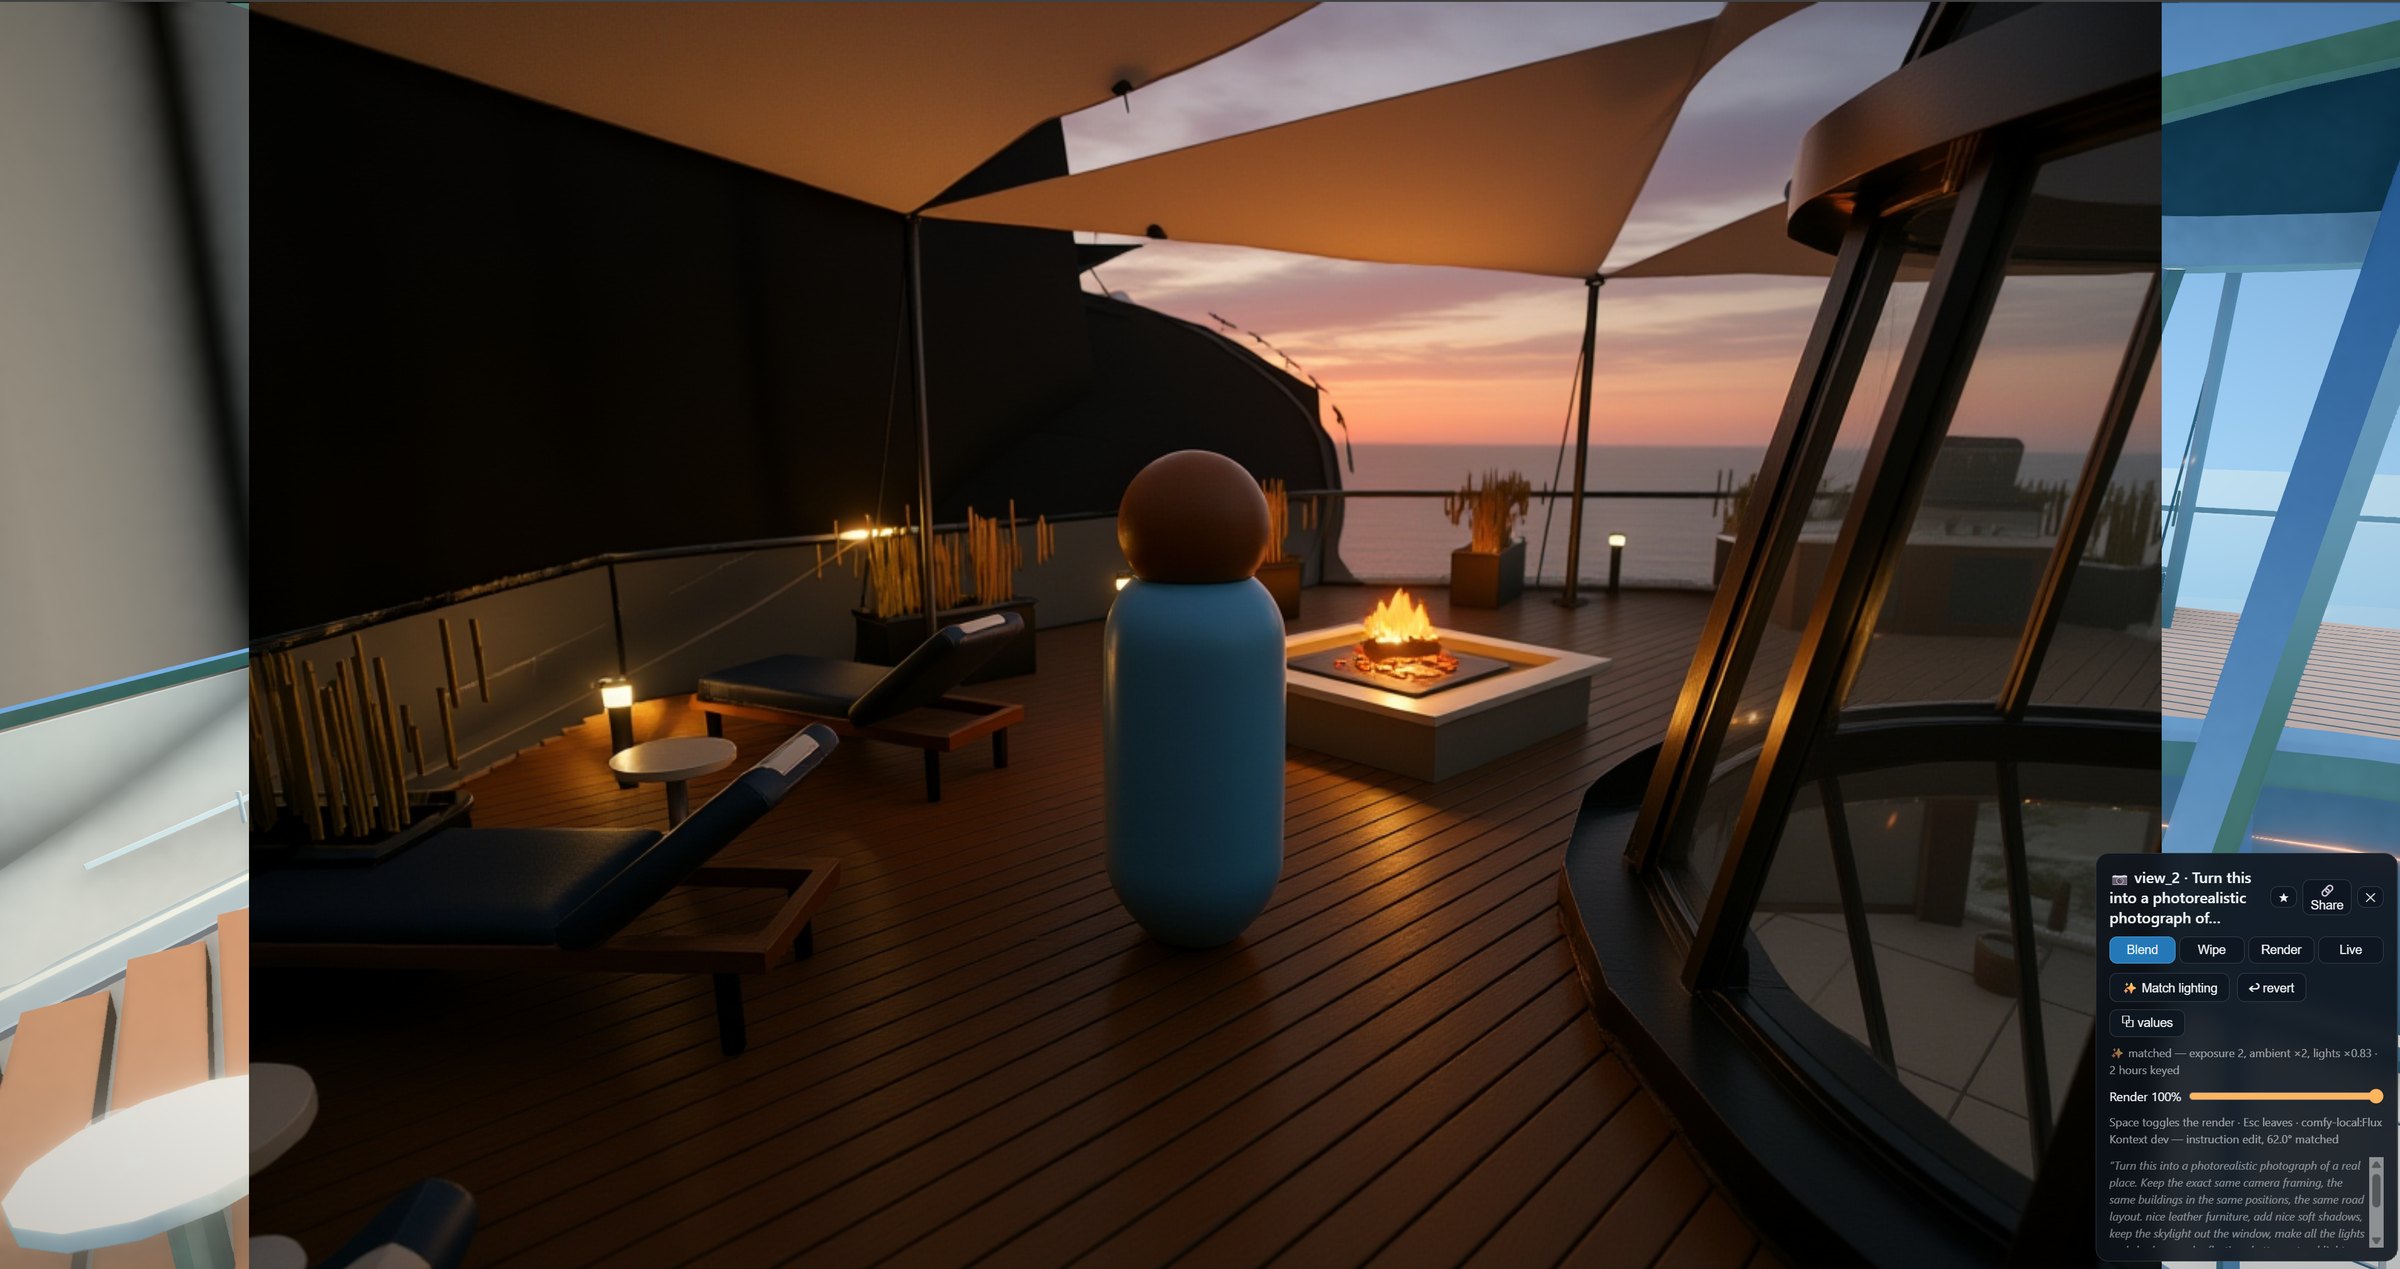
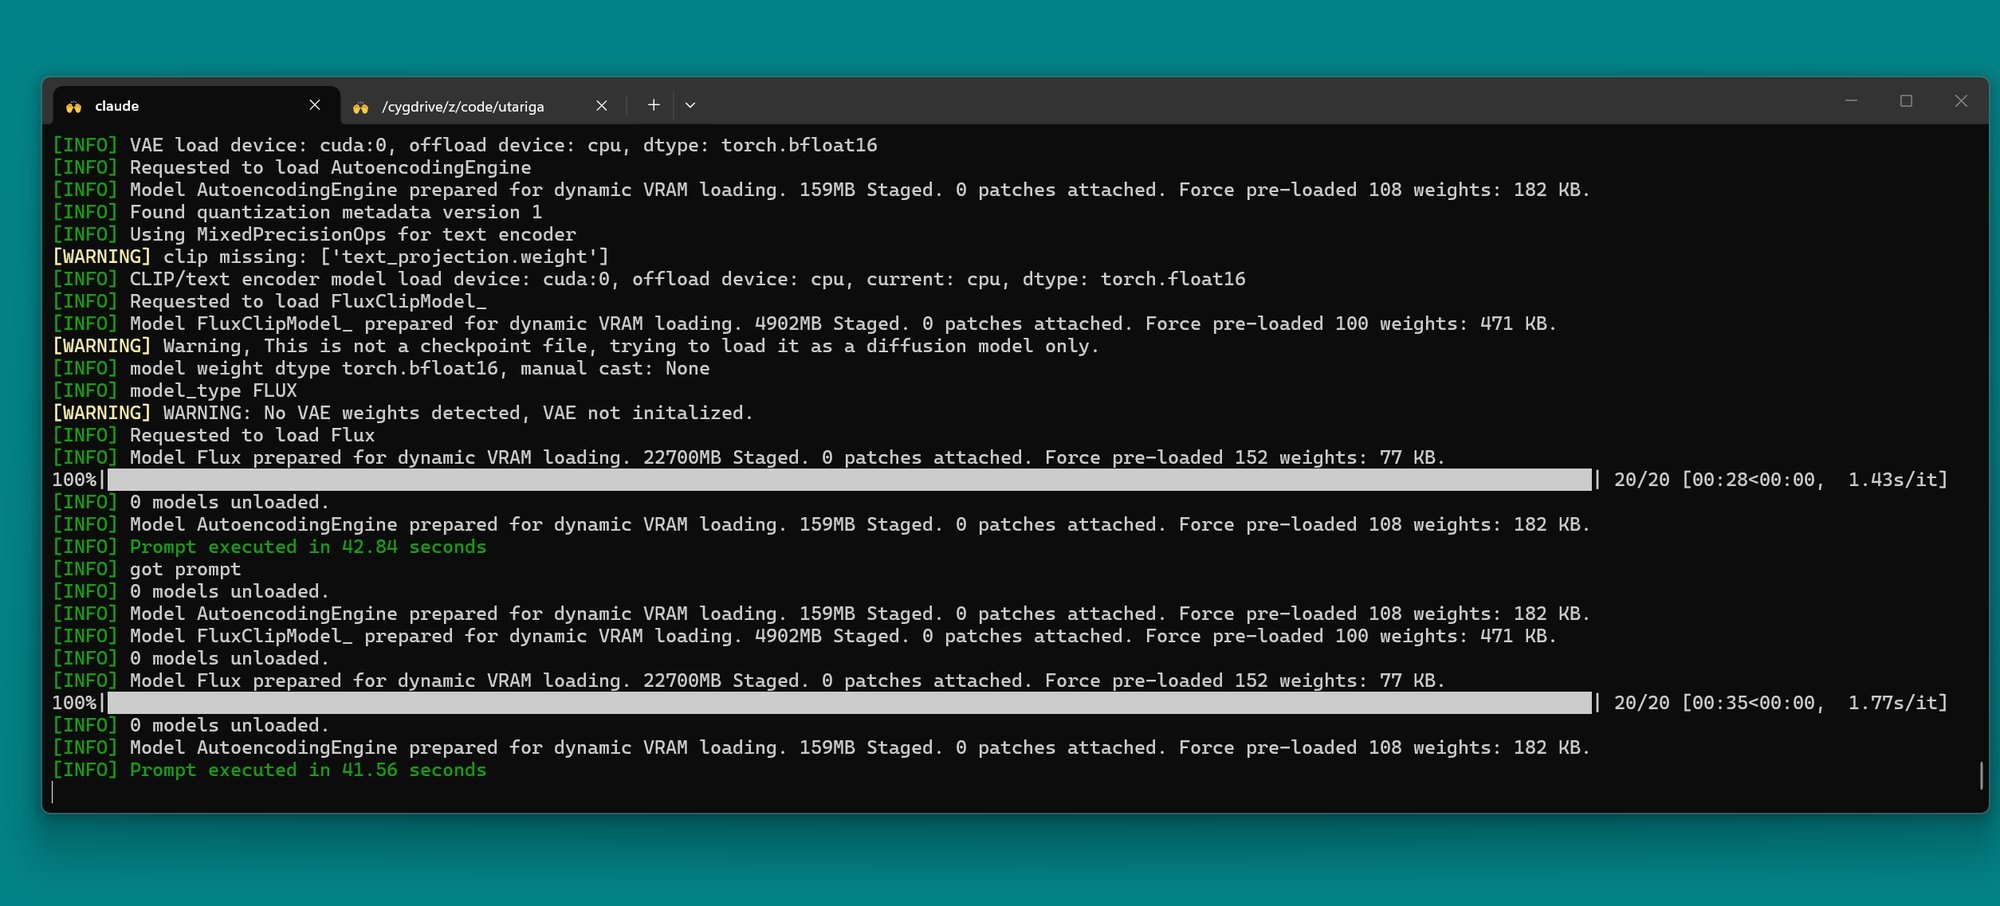
There's an ✨ Imagine panel. It takes the current frame plus a prompt, sends it to a local ComfyUI running Flux Kontext dev, or to Qwen Image Edit on a Hugging Face Space, and publishes what comes back as a render on that viewpoint.
That last part is the whole design. The result doesn't land in a downloads folder. It lands in the same index as the Octane render, on the same camera, and opens in the same blend/wipe overlay. It's a target, not a screenshot.
Framing anywhere in the world creates a shot you can return to, share, and re-roll variations on. A shot framed in the app is kept in a different story document from the ones imported from Blender, on purpose — re-importing a GLB replaces the Blender shots wholesale, and that would otherwise throw away the ones I framed by hand on the same building.
Open as wipe compares on the viewpoint they were generated from
- The Paper Moon Reliquary, wiped against a local Flux Kontext relight → — the prompt was "Re-imagine the lighting only: cinematic AAA…"
- Lux Alpine, wiped against a Qwen Image Edit pass on a Hugging Face Space →
5. Lightmatch — solving the real-time grade against the target
The solver on its own, outside Utariga
- the standalone Lightmatch demo → —
chrisrogers3d.graphics/lightmatch/ - Lightmatch on GitHub → — it's one JS script
This is the part I didn't plan to build. Once an AI relight is sitting on the shot as a target, the obvious next question is: can the engine just match it?
It can somewhat. "Match lighting" runs Nelder–Mead over six parameters, all in log2 space because they're multipliers:
exposure— tone mapping exposureambient— the sun and hemi leak into the roomlightMult— point and spot fixturesareaMult— rect area lightslightWarm— warm/cool tint on fixture coloursemissive— emissive intensity
One evaluation per rendered frame. The solver is a generator that yields a point and receives its loss back from the next frame, so a solve converges in seconds while you watch the room settle, rather than costing a browser-automation round trip per iteration.
The loss compares image statistics, not pixels. The reference
is an AI re-imagining: it invents skylines and re-textures floors, and a per-pixel
loss would chase all of that and produce nonsense. So the loss only looks at
things lighting actually controls — overall exposure gap in stops, key (brightest
5%) and fill (darkest 30%) in stops, warmth as mean R−B, saturation, contrast,
three horizontal band means, and the fraction of pixels crushed to black. That
last term exists because fill is a mean and is therefore perfectly
happy to crush one corner and pay for it with a slightly brighter one.
The useful consequence: what the loss provably cannot move is albedo and content. So the residual after a solve isn't a failure, it's a message — it's the tool telling you the remaining difference is materials, not lights. And the solve owns the room, never the world: the sun is never recoloured or rescaled, and a solve run outside an interior doesn't touch sun, hemi or environment at all.
A single match is a match at a time of day. Do it at several hours and you get a curve — the room holds its intended look at dawn, noon, dusk and midnight, under a day/night cycle that's rewriting the sun every frame. It kinda works, good to read Claudes description: The grade saves per building and re-applies every time that interior is active, including after a reload. It's re-imposed per frame rather than written once, because room clones get rebuilt on every entry and the sky rewrites its lights every frame — and shared materials have to return to their true values the moment you leave the room, or the next solve compounds on top of a graded value.
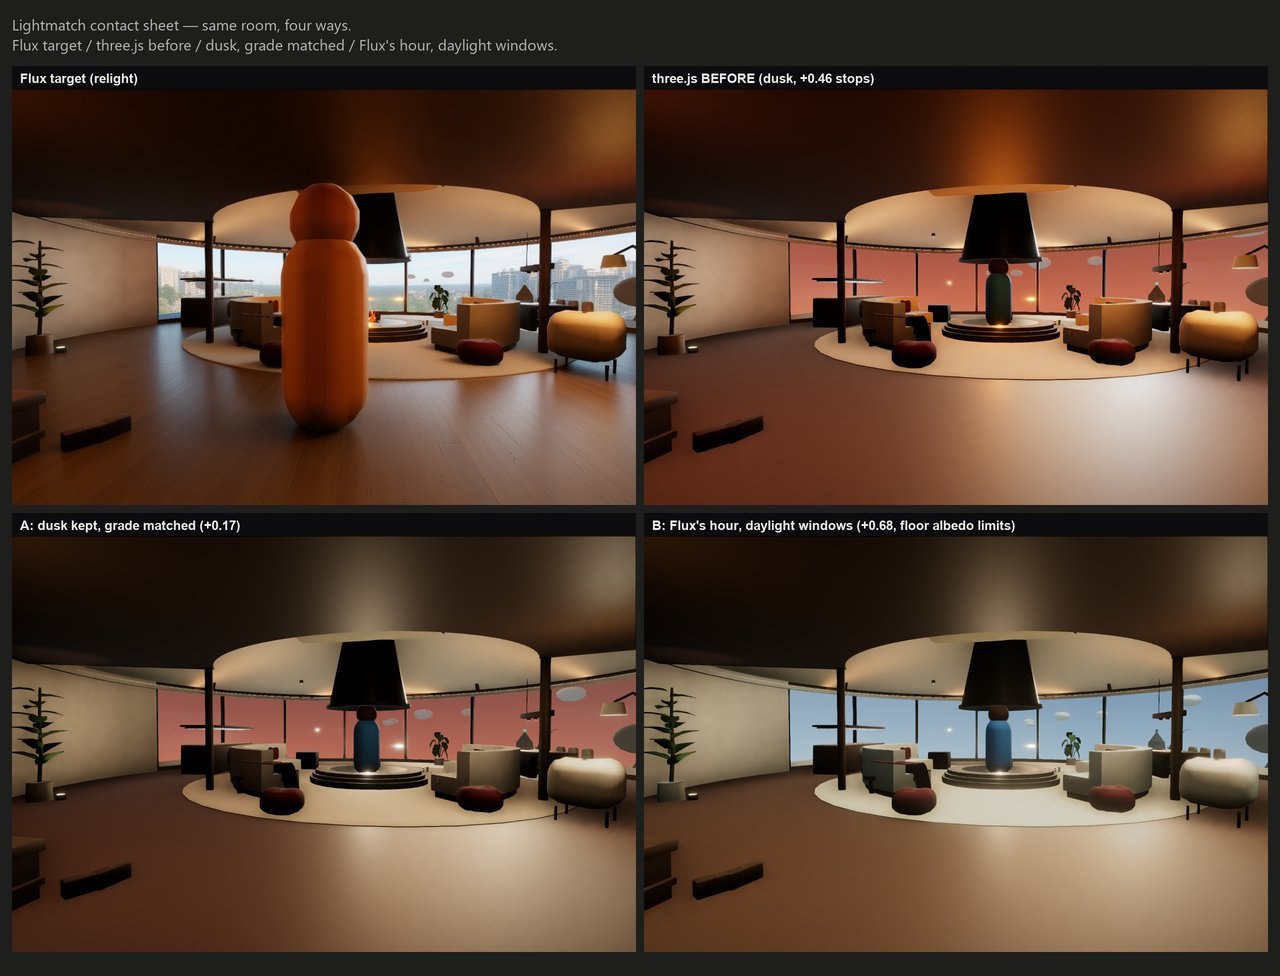
Six numbers, a reference image, and a residual. That's a thing an artist can be handed and can argue with. Which was the point.
In the live app
6. Panorama and depth → Marble → a Gaussian splat, auto-aligned
The app renders a 360° panorama from a point in an interior, plus a measured depth plate for the same point, and sends both to World Labs' Marble. Marble paints a depth-conditioned RGB panorama — the geometry is already fixed by my depth, so the prompt only gets a say over the surfaces — and then generates a Gaussian splat from that enhanced panorama. The splat comes back into the scene and lands in the right place. Marble 1.1 returns much better results than 1.0
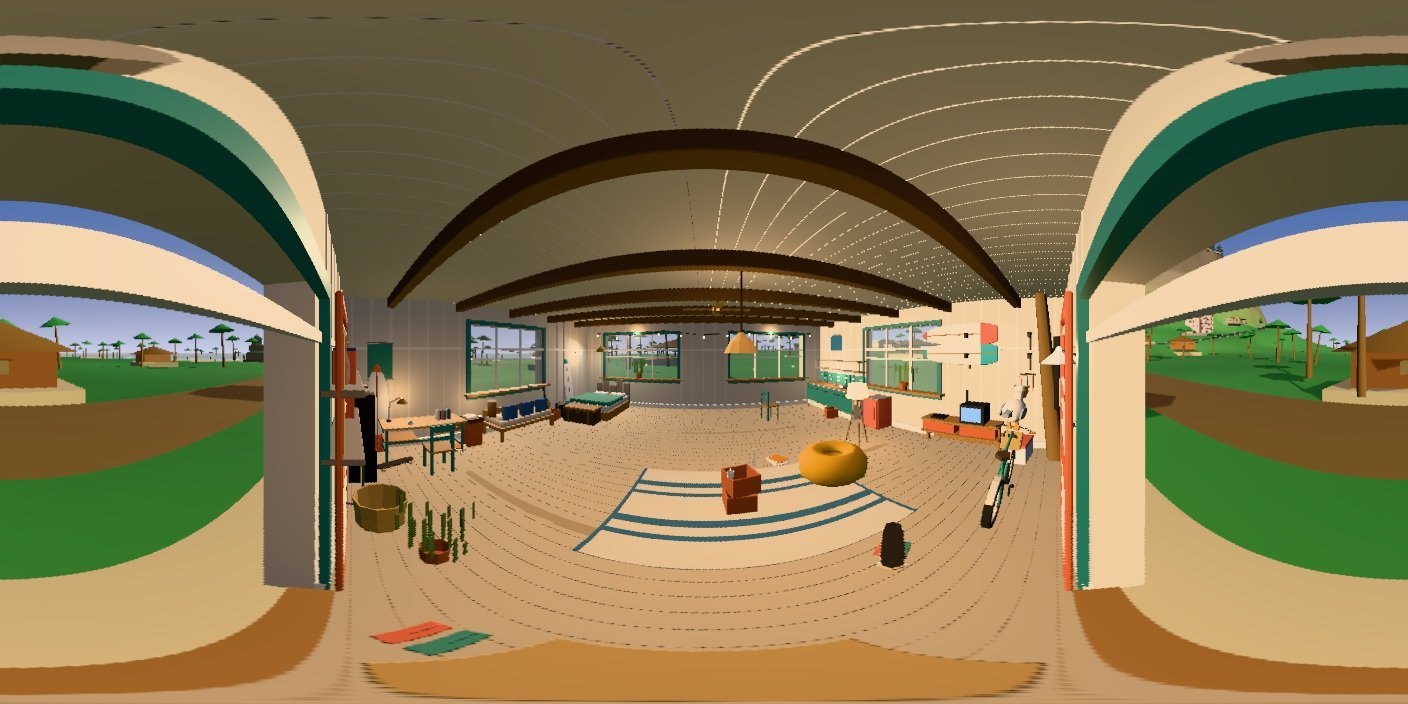
Claude helped me debug making a splat specifically for an interior that exists in a larger world. Two things made this work that wouldn't be obvious. First, the depth plate has to be encoded from percentile bounds, not min/max. A sliver of distant city visible through a window — under 0.05% of pixels — put the maximum at 3 km, and because the encoding is logarithmic between the bounds, those few pixels took most of the 8 bits with them and the room kept 92 of 255 levels. Marble dutifully built a 3 km shell instead of a room. Taking the bounds from the 0.2% and 99.5% percentiles with an explicit metre ceiling gave the first 10 metres 226 levels, and the room came back as a room.
Second, alignment. Marble reports scale and a ground-plane offset but never heading, and its ground offset describes their floor-at-zero convention — applying it as a translation floats the viewer above the generated ceiling. Utariga stands the splat at the panorama capture point, where the height is already encoded, so only scale comes from the metadata. The heading is solved locally, by correlating the scene's equirect against an equirect built from the gaussian data directly. The one Marble 1.1 room I've solved came out at −89.9°, suspiciously close to a −90° vendor convention.
Once it's in, a splat behaves like any other render target: wipe it, blend it, and nudge its scale, yaw and position with a persistent per-render alignment that saves with the entry.
Pairs to open in the live app — the enhanced panorama first, then the splat built from it, on the same camera
- the depth-conditioned enhanced panorama → then the splat built from it, wiped against the live room (press "auto heading") →
- Fonens Café, generated the morning I wrote this: panorama → · splat →
- the best one — a high-quality Marble 1.1 splat of Moth & Lantern →
- another splat of the lobby, low-res Marble 1.0 →
7. Click an object in the splat, get a GLB of it back in the scene
A splat is a nice thing to look at and a useless thing to own (Thats a Claude joke, I guess it meant NFTs). What I actually want out of a generated room is the furniture — as geometry, moveable, physical, casting shadows. So: click an object inside the splat, and the app sends the click points and the capture view to a local ComfyUI running SAM 3, gets a 2D mask back, feeds the image and the mask to SAM 3D Objects, and publishes the resulting GLB into the scene at the right position, scale and bearing.
I havent seen this in a tool before, Im sure someone has done it.
The whole chain is stored as provenance on the render entry: the source render it was picked from, the mask render, and the click points that produced the mask (workflow like Metas AI SAM3 demo) So an object in the scene can be traced back to the splat it came out of, the panorama that splat came from, and the camera that panorama was shot from. (Claude wrote that part, Im not sure its really doing anything but just segment from a screenshot, but might be worth looking into)
Two hard limits worth stating plainly. SAM 3D's texture baking does not fit on a 24 GB 4090 at any setting (Im pretty I did get it to run textures locally but was not stable) — it loads the whole mesh and the whole gaussian field before simplifying — so vertex-coloured GLBs are the ceiling here. And the masks are unseeded and vary run to run; one run masked an entire wall and faithfully produced a wall-blob GLB, so I always eyeball the mask tint before building. Meshes arrive around a million triangles and normalised to a unit box, which means a retopology pass stands between "extracted" and "prop". Next steps include other image to 3d gen like Trellis2.
Extracted objects, with the provenance chain intact
- DJ booth → — mask
r_msgjde6u_m4a6iy, cutoutr_msgjde6y_62gu4x, then the 3D object, with the provenance chain intact
8. One building, end to end: Argonaut Neon
Everything above is a feature demo. This one is a case study: I asked Claude to pick any multistory building with no interior and give it the full treatment — name, backstory, a business designed to fit the story, the Blender pass, twelve Cycles cameras, relights, solved light grades, and a narrated tour. One session, subagents doing the modelling and the feature work in parallel.
It chose a five-storey block whose street dead-ends into the beach and made it Argonaut Neon — a second-generation neon sign workshop (signs mostly run on argon; the founder came ashore to fix the pier sign and never left). Bending benches and a rainbow rack of tube stock downstairs; upstairs the Boneyard, a dark room where the rescued signs of Utariga's closed businesses burn every night — including KOPI KAI's retired coffee cup and the Ratsnest's old rat. The motto is stencilled on the stair risers: WE KEEP THE GHOSTS LIT.
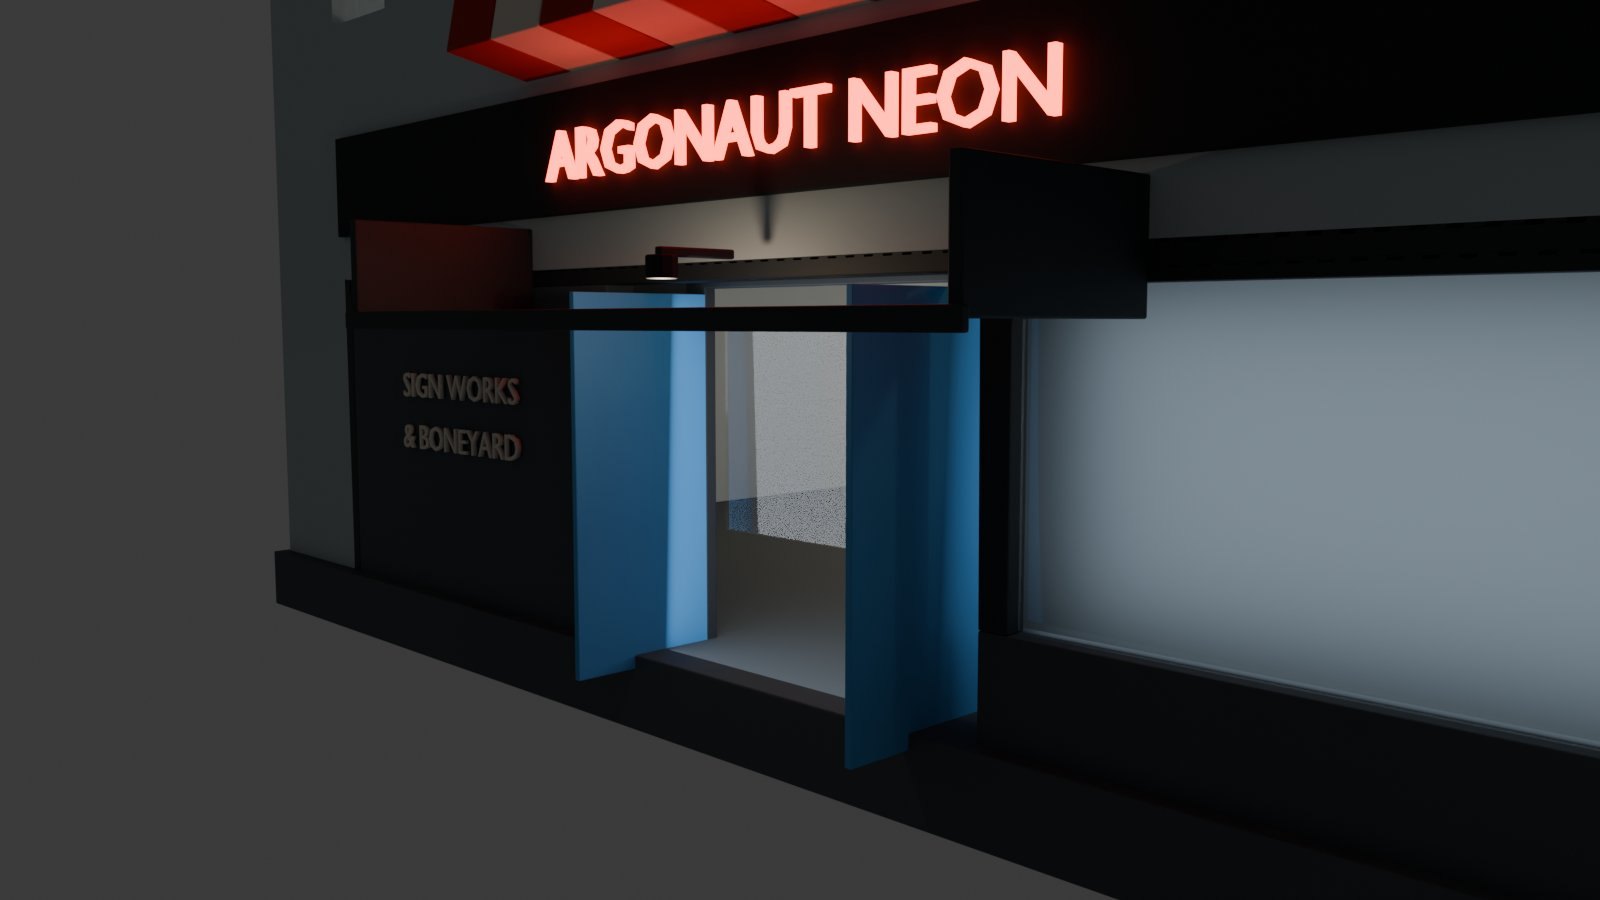
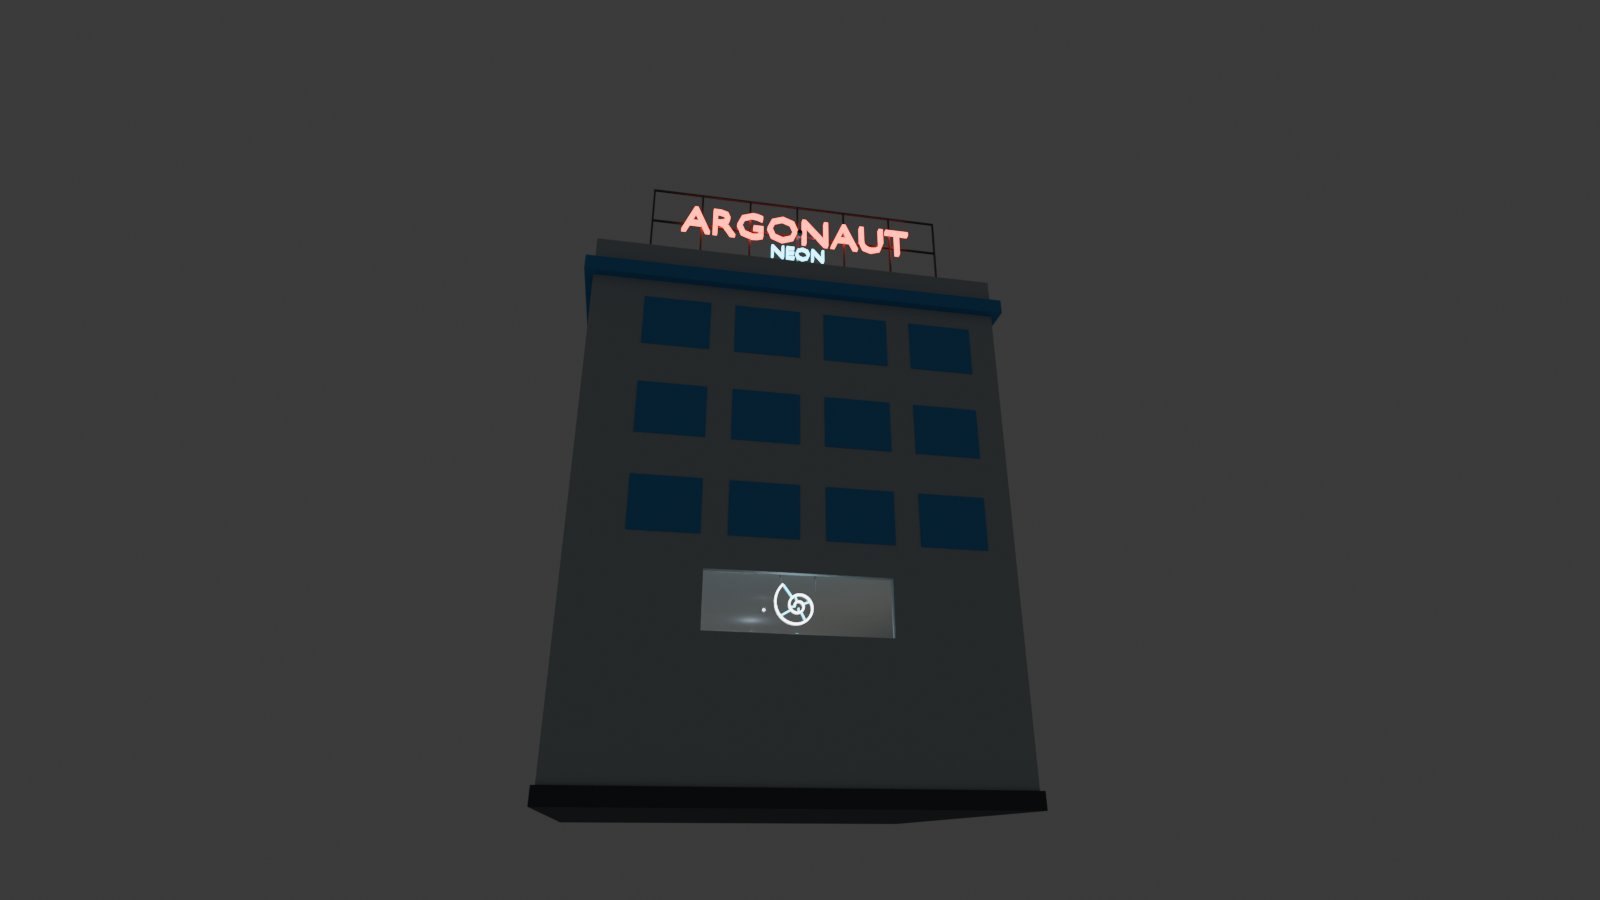
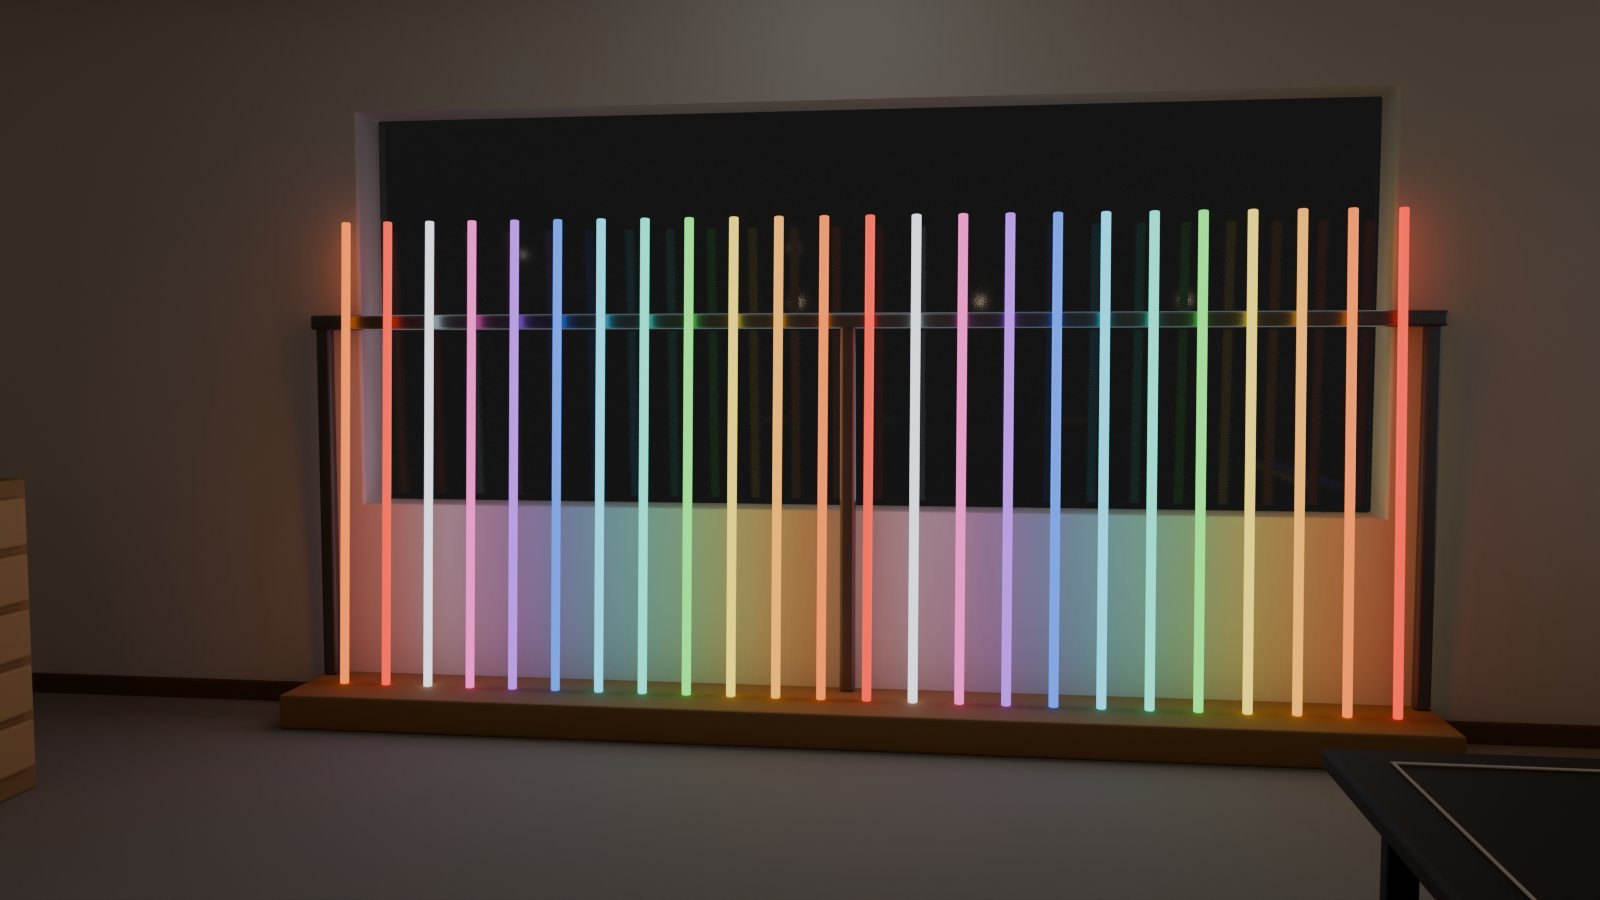
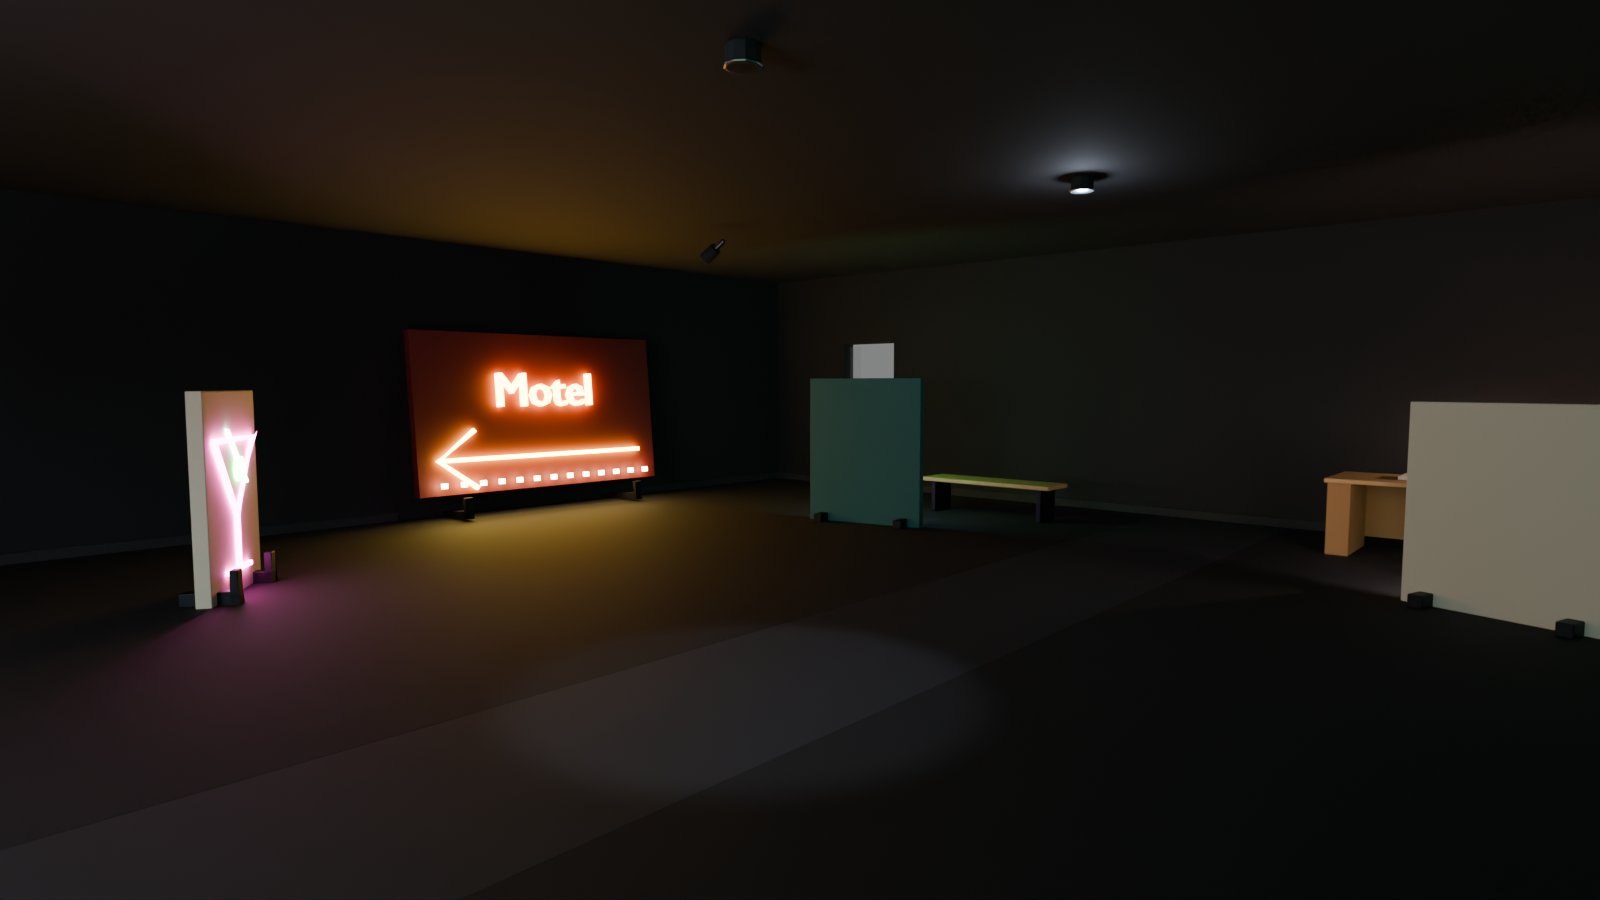
The part I'd show a game studio: the in-game walk test caught a defect no Blender check saw — the avatar hard-locked at the top of the stairs because the last tread and the mezzanine deck met edge-to-edge, and the engine's one ground-probe ray fell into the seam. Blender's double-precision raycasts always find one of the two faces; the engine's float32 doesn't. The fix (overlap every walk-surface junction in plan) went back into the build script as two new verify checks, both proven to fail on the unfixed scene first.
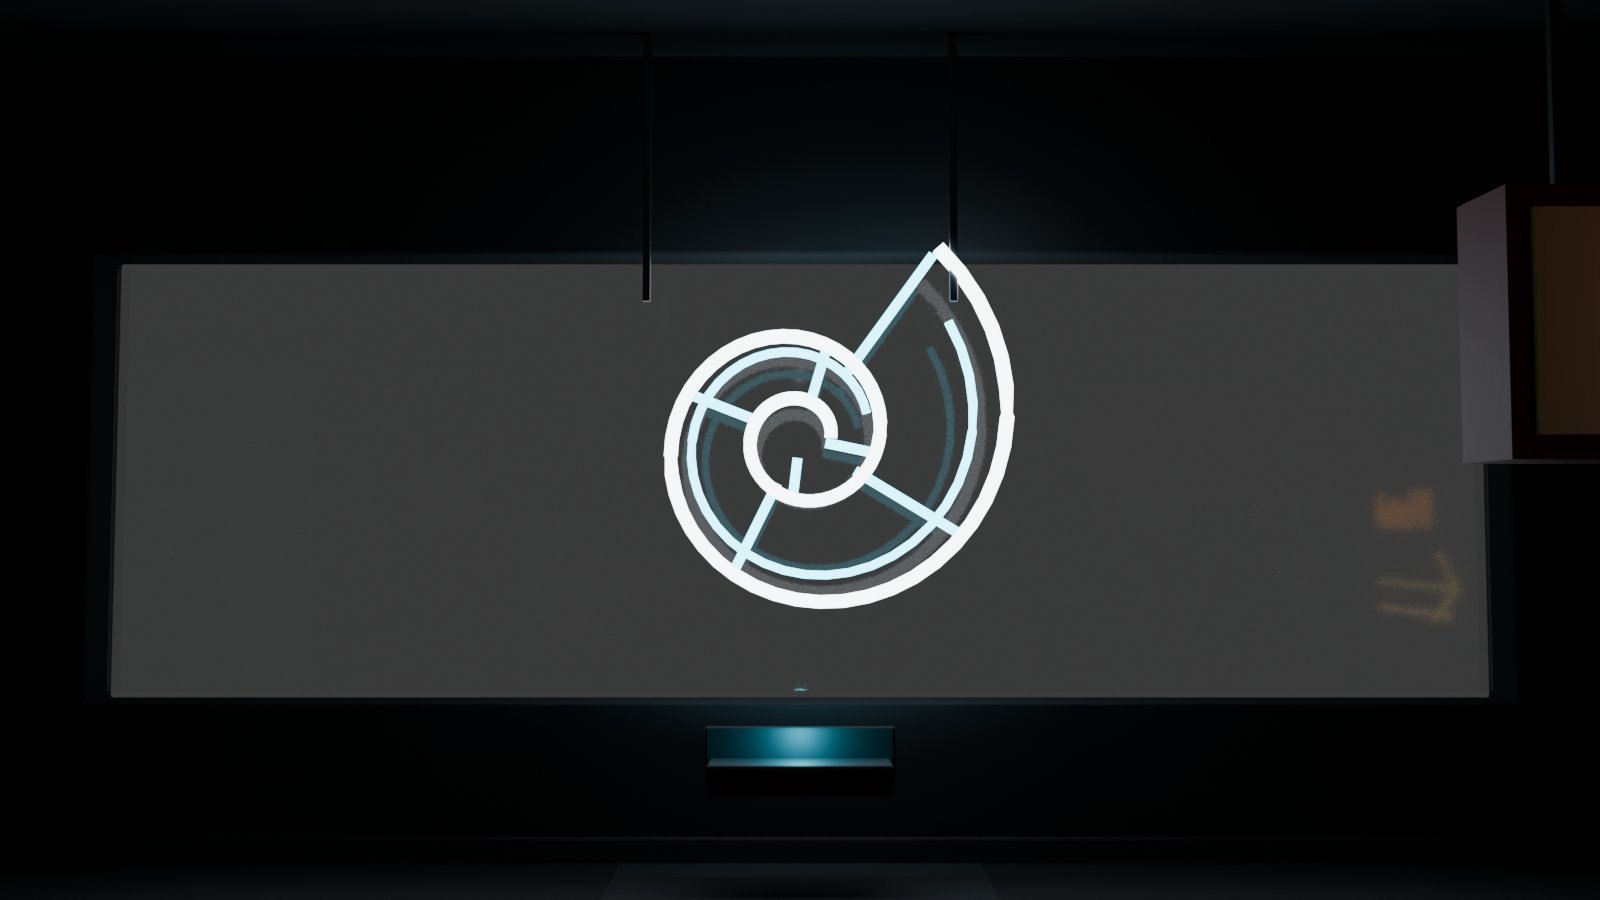
Then the lighting loop closed: Flux relights of the live frame at three hours became solve targets, and the solver's three keyframes say what the building is — at midday the sun carries the room and the neon is just color; by dusk the tubes are at 2.3× and the fixtures have dropped away; at midnight the signs run at 4× and are the only light there is. Nobody authored that curve. It was solved out of three pictures.
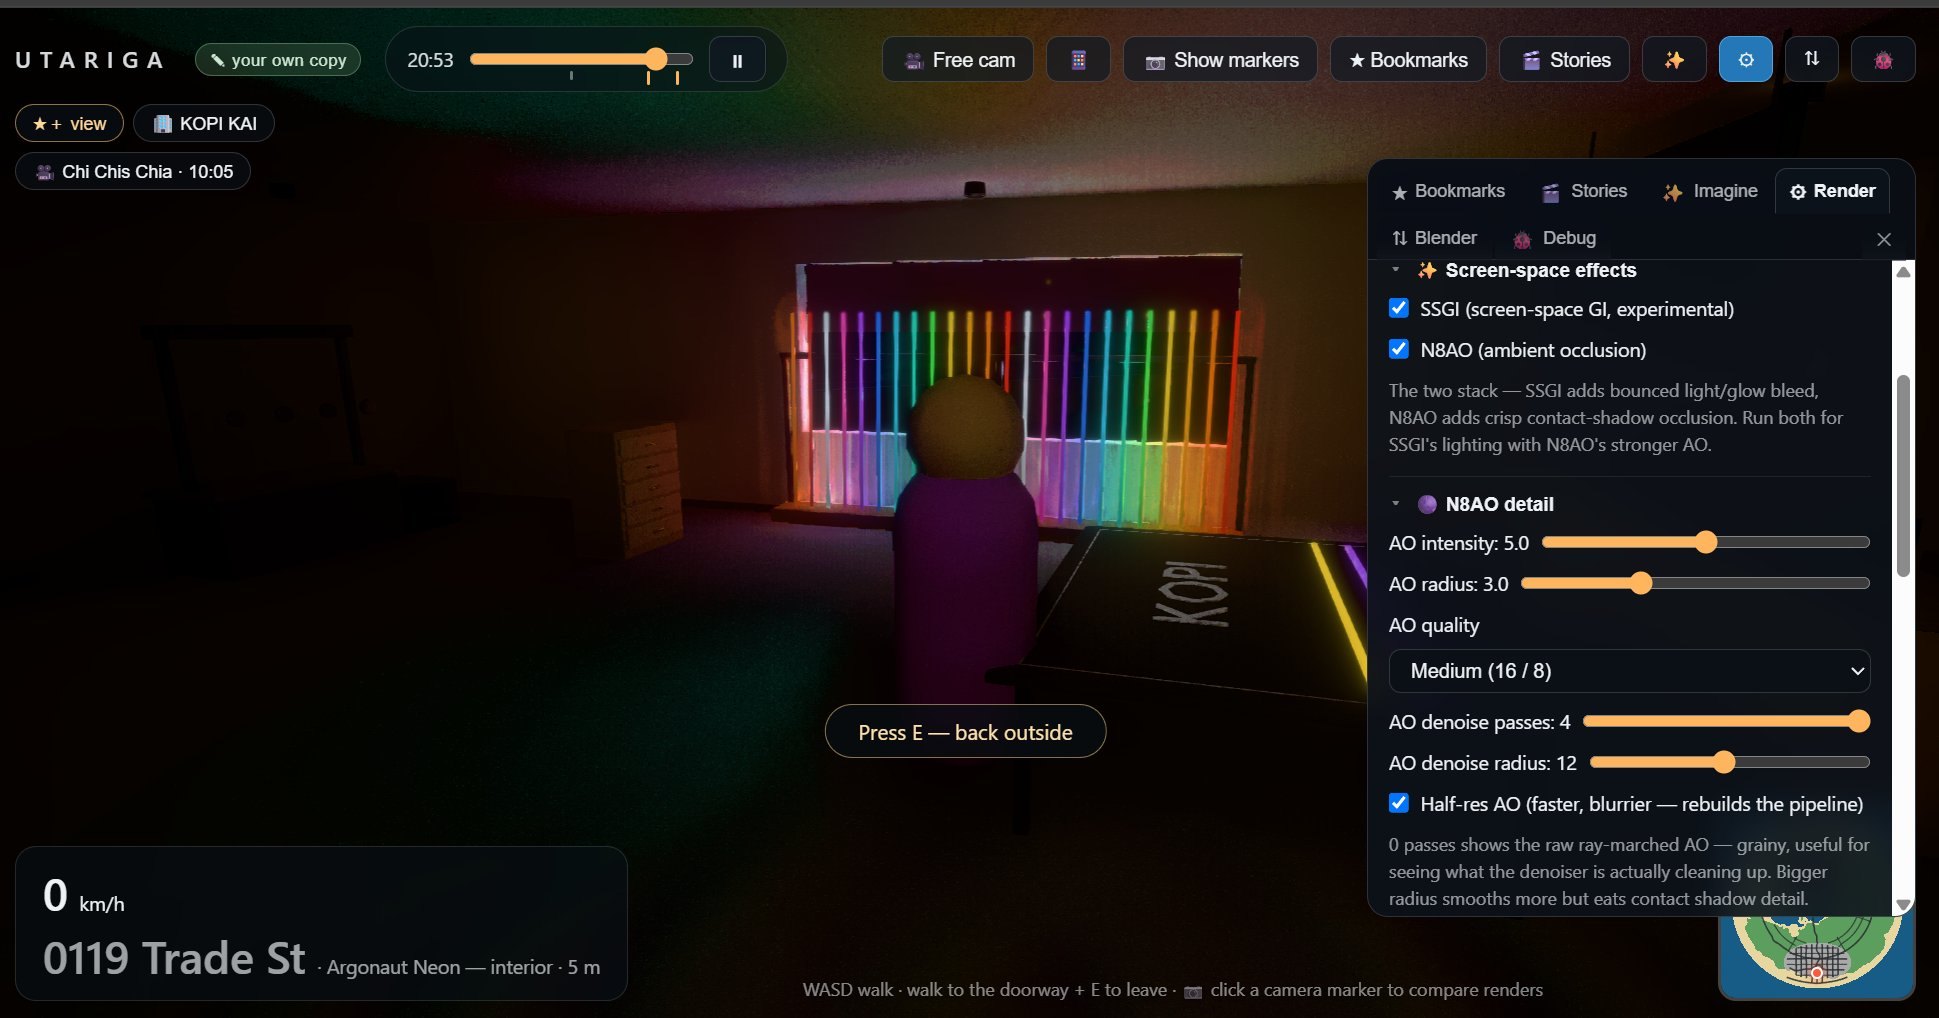
In the live app
- the Boneyard with SSGI on → — the deep link carries the settings too
- ▶ the narrated tour — 12 shots, the shop's keeper talking over each one → — the new dialog cards
- the rainbow rack, Cycles wipe →
- the Boneyard, Cycles wipe →
- the roof sign from the sand →
- the dusk relight the 0.83 light key was solved from →
- the Boneyard night target →
The full build record, step by step, is in
presentation/argonaut-neon-build.md.
I had Claude make three more stories and buildings. It likes bars and old shops and spiral staircases.
The other three narrated tours
9. Six storeys and no elevator: The Tidesetter
The newest one is the biggest interior I've had Claude build here: The Tidesetter, a six-storey hot-metal print works at 0156 Seaglass Blvd, one dog-leg stairwell, no lift. It turns out to be the shop that printed everything the other tours already showed you — Chi Chi's Friday posters, KOPI KAI's cup sleeves, Auntie Salt's menus, even the harbor board's cease-and-desist letters — and it closes a loop the Argonaut build opened: the unexplained dead sign sitting on Vas Maru's workbench with a repair tag is this building's own roof sign, off getting re-pumped. One letter, the T, stayed home, wired to the parapet and lit, so the boats still know the tides are set. The tour climbs the one stairwell floor by floor — press hall, composing room, paper store, poster studio, a printer's morgue holding a locked, never-run final edition, the keeper's own room, then the roof — and evening genuinely falls as you climb, because it's the first story built to use the two features below.
Scale: six storeys plus a walkable roof deck, at twice the set-dressing density of the last few builds. It stays fast anyway because of instancing at every level — in Blender every repeated family (type cases, ream stacks, ink cans, framed posters, drying-line prints) is linked duplicates of one datablock, the exporter emits `EXT_mesh_gpu_instancing`, and the loader turns that back into real `InstancedMesh`es in three.js: 528 GPU instances across 28 families. 24 cameras, all visibility-checked; 22 carry a voice line from Tobo Brevier, the shop's last hot-metal printer, over two silent visual beats. The walk test caught one defect worth mentioning on its own: a hairline gap at every floor's slab seam that Blender's own raycast verification couldn't see — its double-precision BVH always finds one of two coincident faces at a perfect butt joint, but the engine's single float32 ground ray found the gap and froze the avatar mid-floor. Fixed with real overlap at every panel joint, and a new measured check that Blender's raycast alone can't provide.
Two engine features shipped alongside it. Story shots can now carry their own
timeOfDay and a pinned light grade, eased in over about a second — this is
the first tour to use them, so the sky genuinely goes from golden dusk on the
boulevard to full night on the roof over one walkthrough, graded against solved
lighting rather than an authored guess. Older stories are provably untouched: the
snapshot/restore that saves and restores the sky only runs for shots that use the new
fields at all. And the playback timeline is scrubbable now — drag or click anywhere on
it and the seek reuses the same pose math a natural walkthrough uses, so camera,
dialog card, field of view and per-shot time-of-day all land exactly as if you'd
arrived there by watching.
In the live app
- ▶ the narrated tour — 24 shots, evening falls as you climb →
- The Tidesetter, 0156 Seaglass Blvd →
- the Linotype and its lead pot, Cycles wipe →
- Maren's last, unprinted edition, Cycles wipe →
- the roof, the lit T, Last Light answering across the gap →
Full build record in presentation/tidesetter-build.md.
Hidden features and known issues
Hidden features
- Show frame stats.
- Capture performance data.
- Record stories using camera shots or driving paths.
- Save panoramas, depth panoramas, segmentation images, and mask images.
- New story and dialog tools. Claude used them for the Argonaut tour, but I have not explored them much yet. One of the original ideas for this project was to make a place for telling stories.
Known issues
- Performance: certain views can make my 4090 run hot at 4K. The frame rate defaults to 60 FPS on desktop, but it can be uncapped.
- Mobile: it actually works on my Pixel 10, even with SSGI on. Mobile FPS is capped at 30 by default, but it can be uncapped.
- Splats on mobile: tough right now. I have not looked at optimization or quality levels yet.
- Blender MCP: can crash occasionally.
How it's built
You should be able to (untested lately) enter your API keys in the browser and
have it call Hugging Face and Marble. If you run it locally, you can put your keys
in .env instead.
three.js for rendering, plain React (not react-three-fiber) for the UI, Vite to
build. An Express server behind /api with Postgres (never actually tested, my server is tiny), falling back to a
JSON file and then to localStorage, so it runs with zero infrastructure. Post
pipeline is pmndrs postprocessing — N8AO, bloom, ACES, SMAA, vignette,
with an experimental SSGI mode. The city renders in a handful of draw calls:
buildings merge into two meshes, vegetation and lights are instanced.
The Blender authoring is Claude — Opus with Fable making plans — driving a live Blender session through an MCP gateway. Renders come from Cycles and Octane. Image generation is Flux Kontext dev locally through ComfyUI, or Qwen Image Edit on a Hugging Face Space. Splats come from World Labs' Marble; object extraction is SAM 3 and SAM 3D Objects, both local with comfy. Meta's Segment Anything
Elsewhere
- try it — the live app →
- the source, on GitHub → —
github.com/chrisrogers3d/utariga - chrisrogers3d@gmail.com